Setting up L2TP/IPSec VPN in Ubuntu 18.04+
Set up L2TP/IPSec VPN

From my experience, I've found out that setting up L2TP VPN is a pain in the b*tt. These are the methods that I have found out to be working from the posts here . I shall mention them below. 3DES cipher is the issue with Linux and L2TP/IPsec Ubuntu 18.04 and up
If you are running Ubuntu 18.04, 20.04 or anything in between and after, follow the steps to configure IPSec/L2TP VPN
Run the following commands
sudo apt install network-manager-l2tp network-manager-l2tp-gnomeThis installed the L2TP module for the network manager
Next, stop and disable xl2tpd.service
sudo systemctl stop xl2tpd.service
sudo systemctl disable xl2tpd.serviceNow we can switch to GUI and configure the VPN
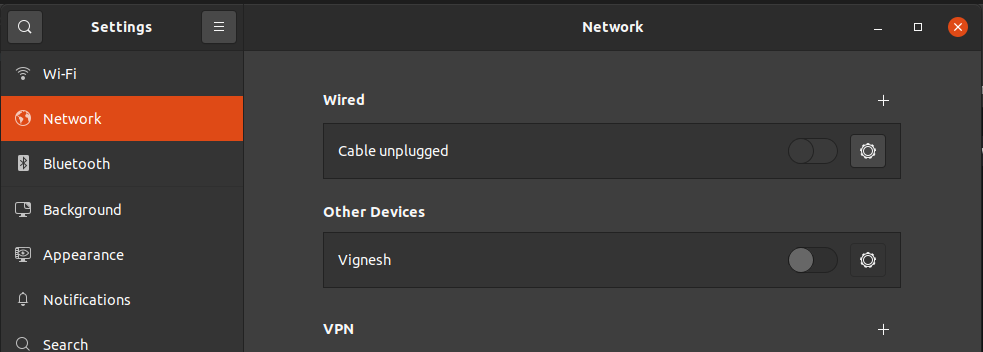
Open Settings and go to the VPN section of the Network tab

Click the + sign to create a new VPN

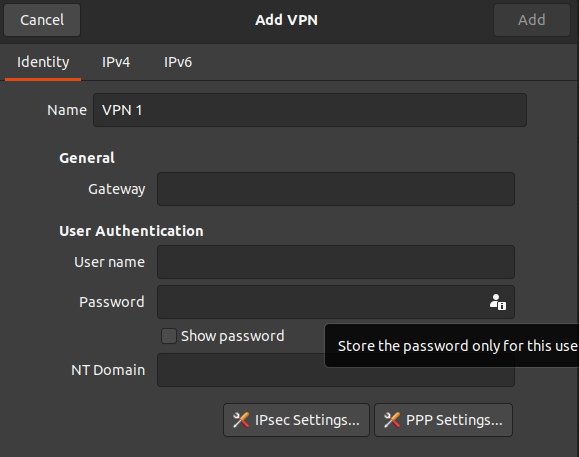
This opens up the window to add new VPN

Enter a name for you to understand which VPN it is, then enter the Gateway (which will be an IP or a domain name)
Enter the username and password. To enter the password, click the small icon and select the option to store the password for this user.
You can leave the NT Domain section blank
Now open the IPsec Settings...

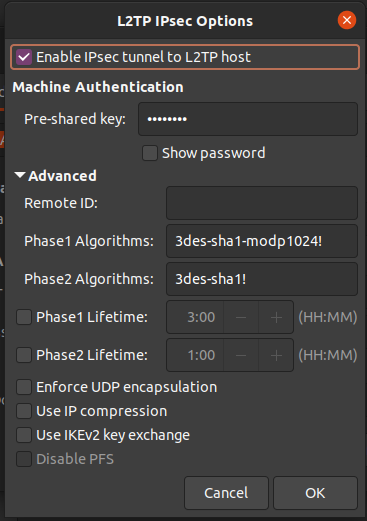
Here make sure the Enable IPsec tunnel to L2TP host is checked and enter the pre-shared key if your VPN has it.
Then for enter the following
Phase1 Algorithms
3des-sha1-modp1024!Phase2 Algorithms
3des-sha1!Leave the rest of the settings unchecked and click OK
Now open up the PPP Settings...

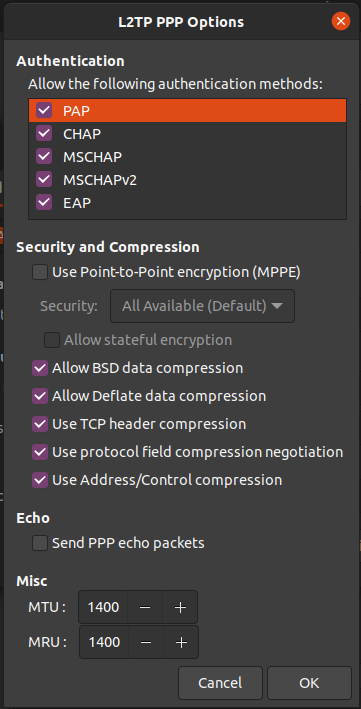
Make sure that all the options except Use Point-to-Point encyrption (MPPE) and Send PPP echo packets are checked.
Now you can connect to an L2TP VPN in Ubuntu.

