Setting up a serverless Wordpress in AWS
First step to setting this up is getting an AWS account. If you already have one, then great!, Otherwise follow the instructions here to create and activate an AWS account.
Login to your AWS account
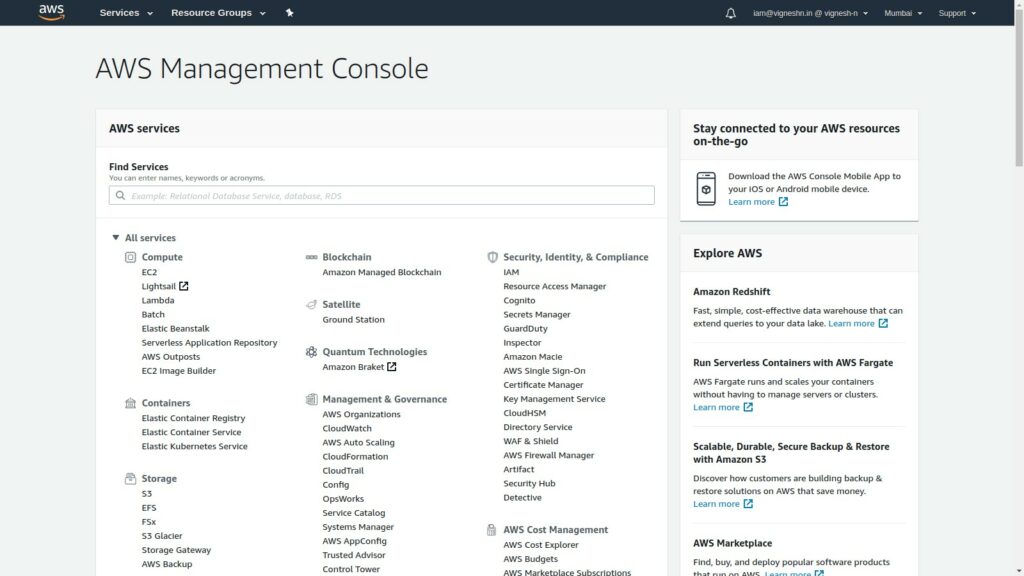
First step to setting any resources in AWS is to create a VPC
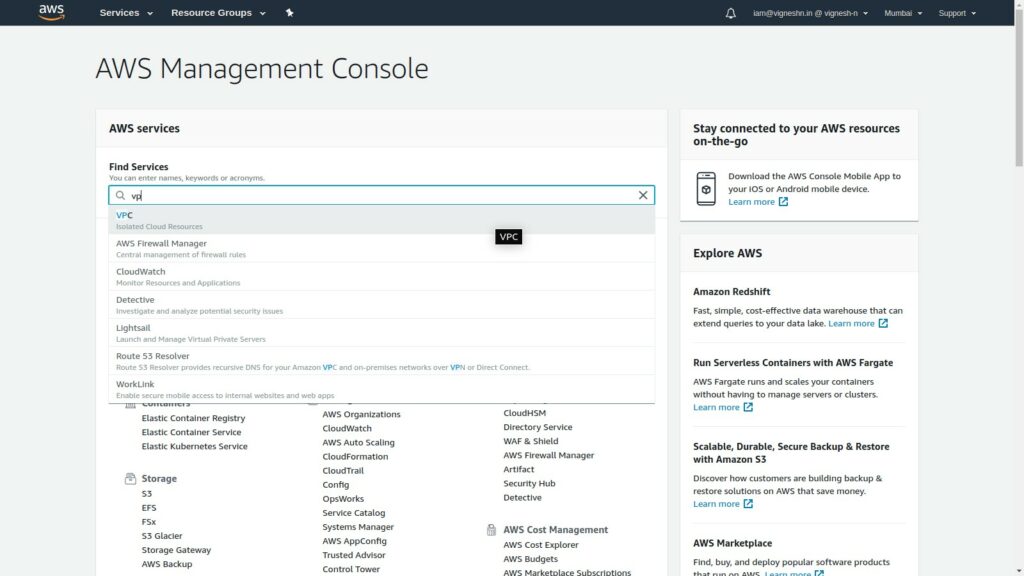
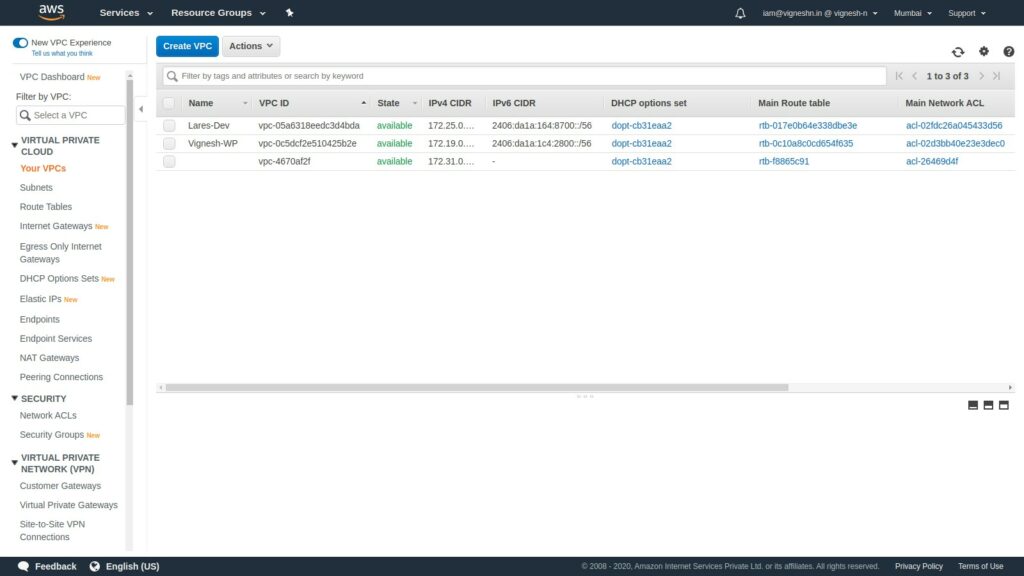
To create VPC Navigate to Services Tab → Select VPC →then Select Your VPCs → click on “Create VPC”
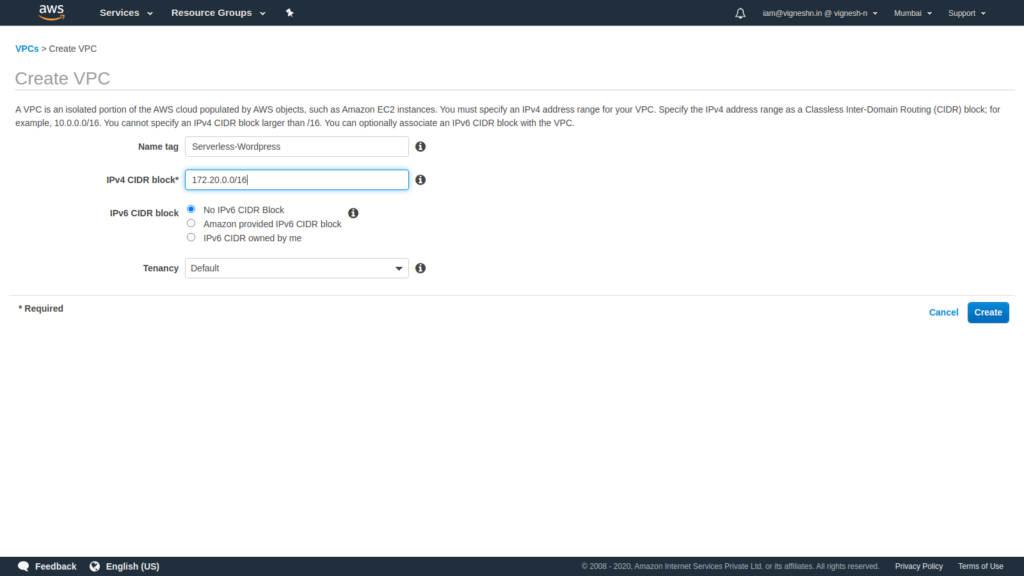
Specify your VPC name in Name tag , mention the IPv4 CIDR block. Click on “Create”. Your VPC will be created.
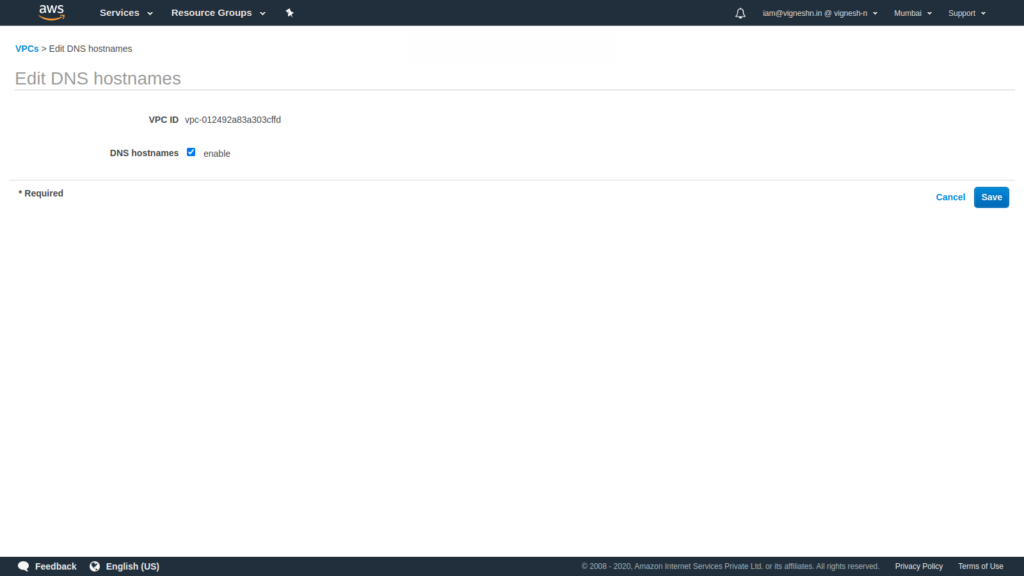
After creating VPC, DNS hostnames should be enabled. This is done so that the EFS DNS endpoint is resolved from inside the VPC and not via public internet. To enable DNS hostname, select the VPC, then click on Actions button and select Edit DNS hostname option
Check the enable option in DNS hostname and then click on Save button.
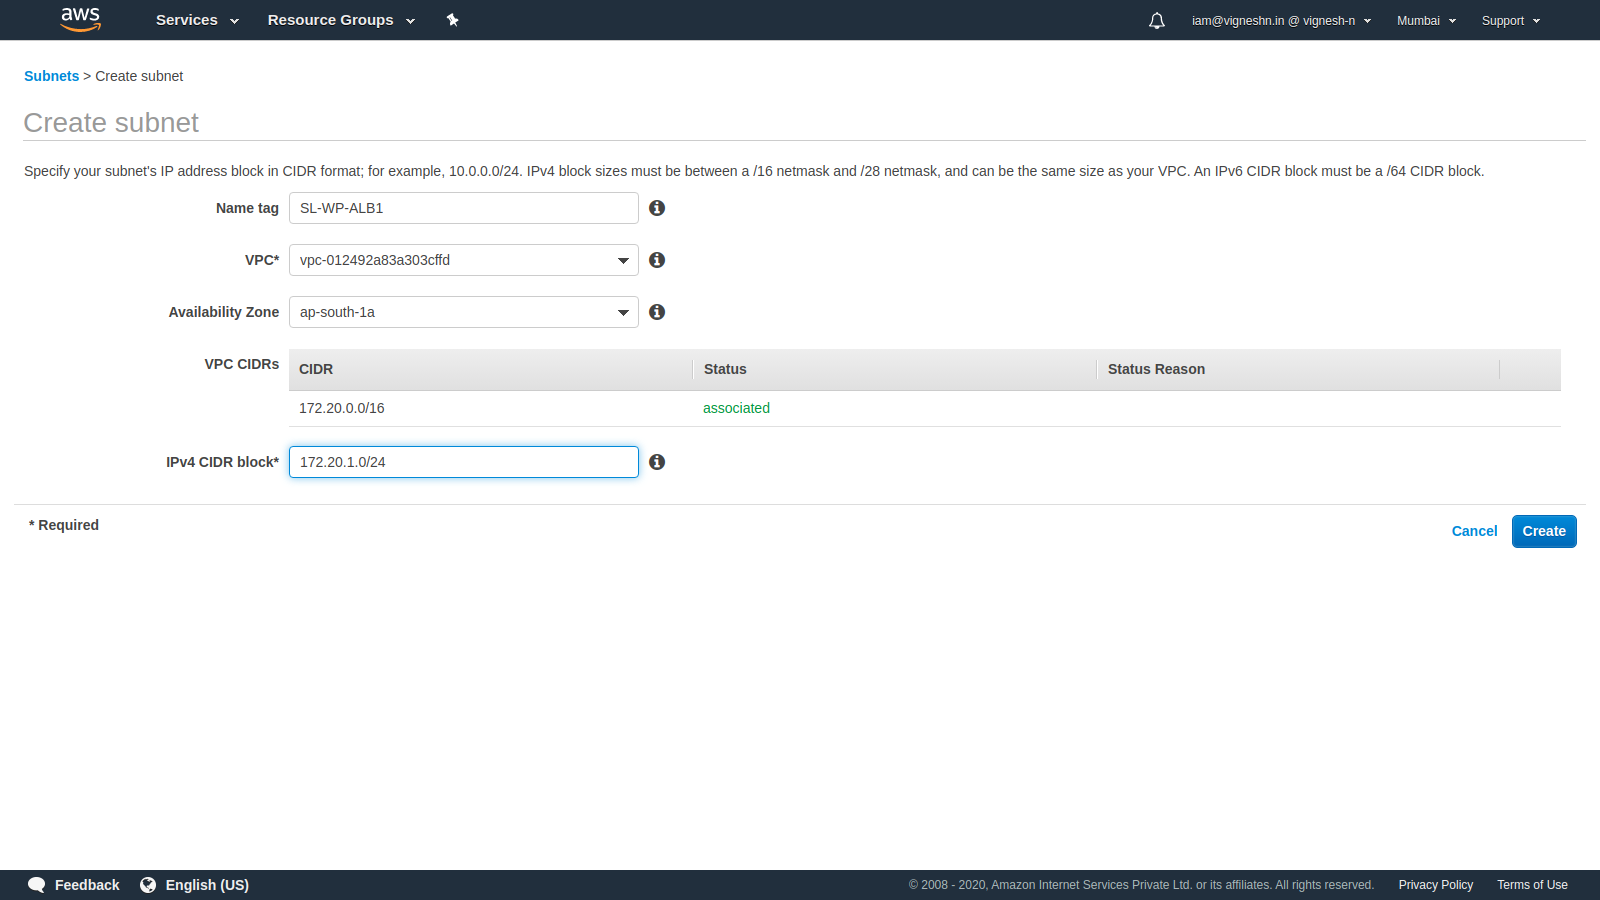
Next we need to create subnets for the load balancer, ECS, RDS and EFS
First create the subnet for the Load Balancer
To create a highly available system, the subnets for ALB is created in two separate availability zones.
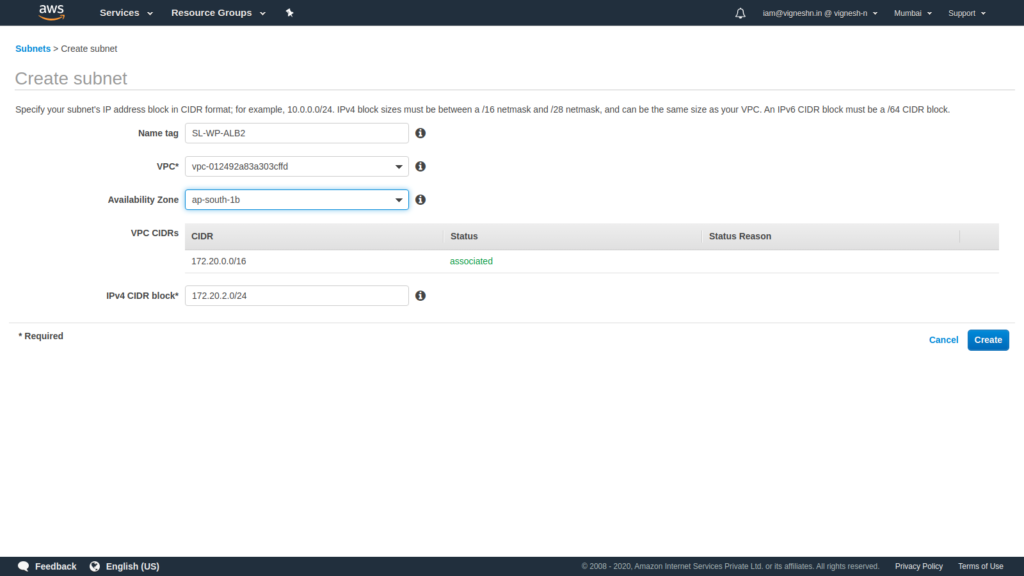
Do the same for ECS
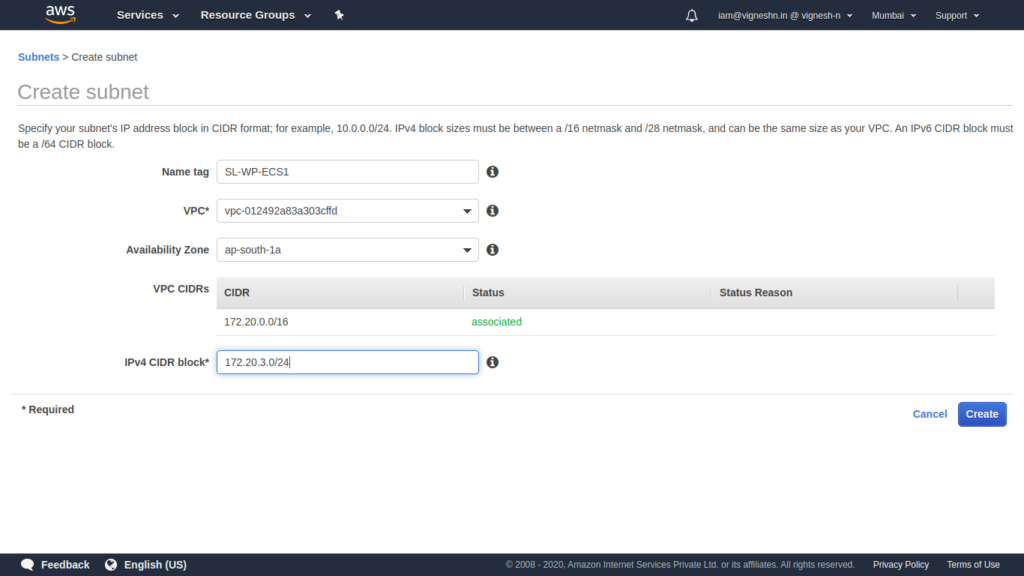
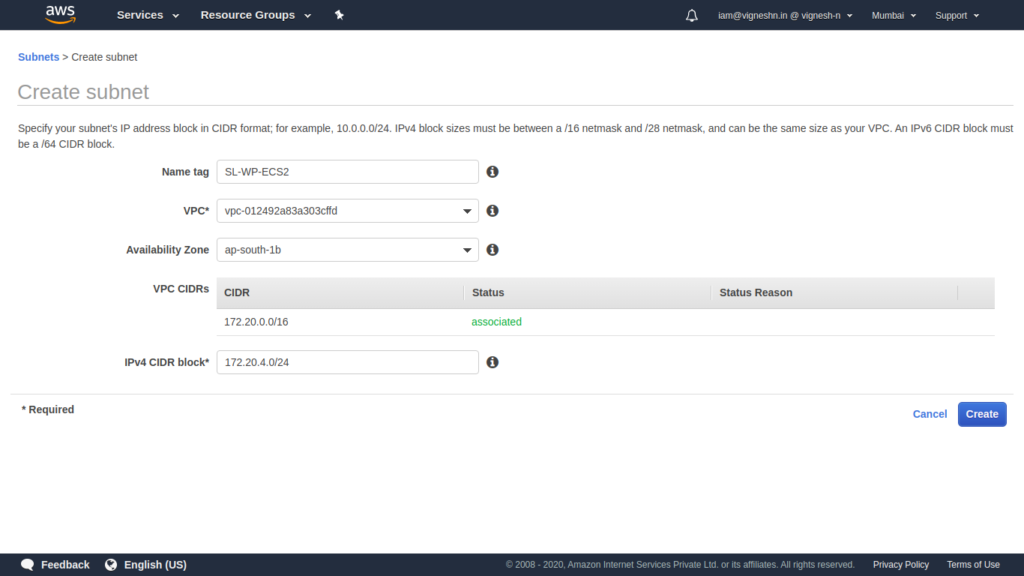
I was doing this on a 4G internet without proper network coverage so you too have to sit through my loading screens… Make sure to pause here for 5 to 10 seconds as a tribute to the people who use 2G data.
Create two subnets for EFS also
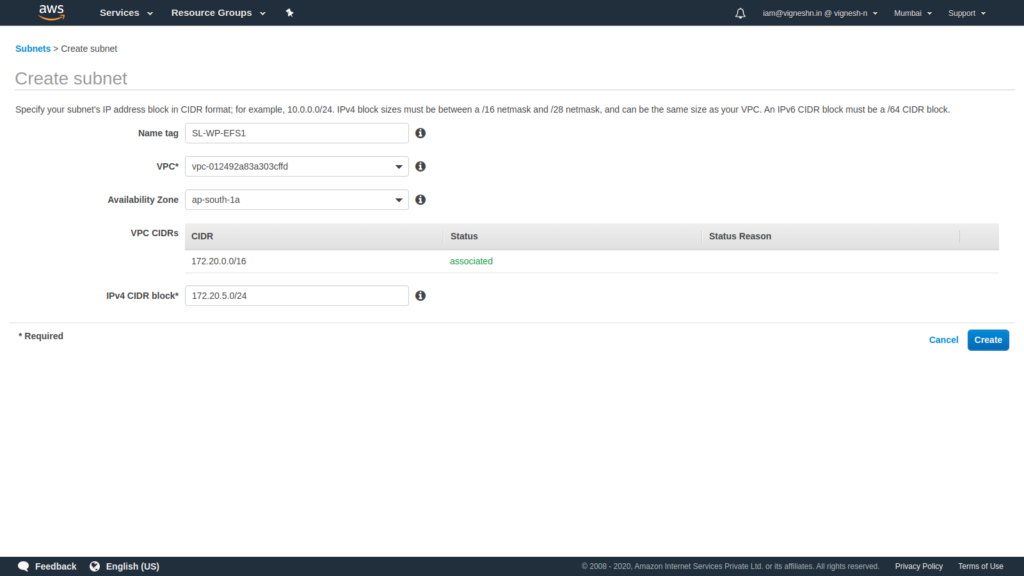
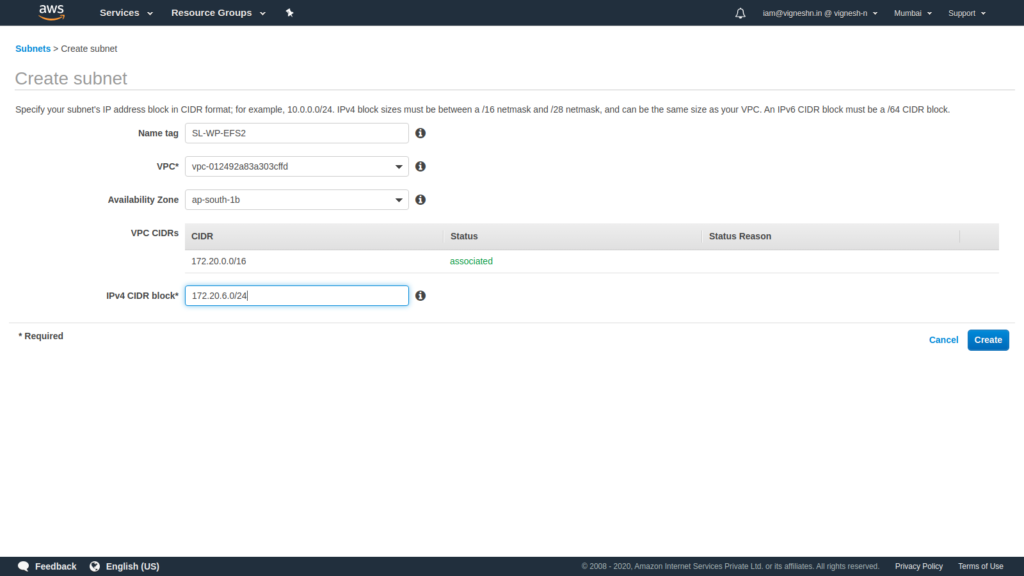
Finally create two subnets for the RDS.
As you can see the subnets that we created are in ap-south-1a and ap-south-1b availability zones. We did not used ap-south-1c availability zone only because AWS does not support Aurora serverless MySQL in ap-south-1c availability zone while I was creating this setup for this website and for the new one that is being setup for writing this blog.
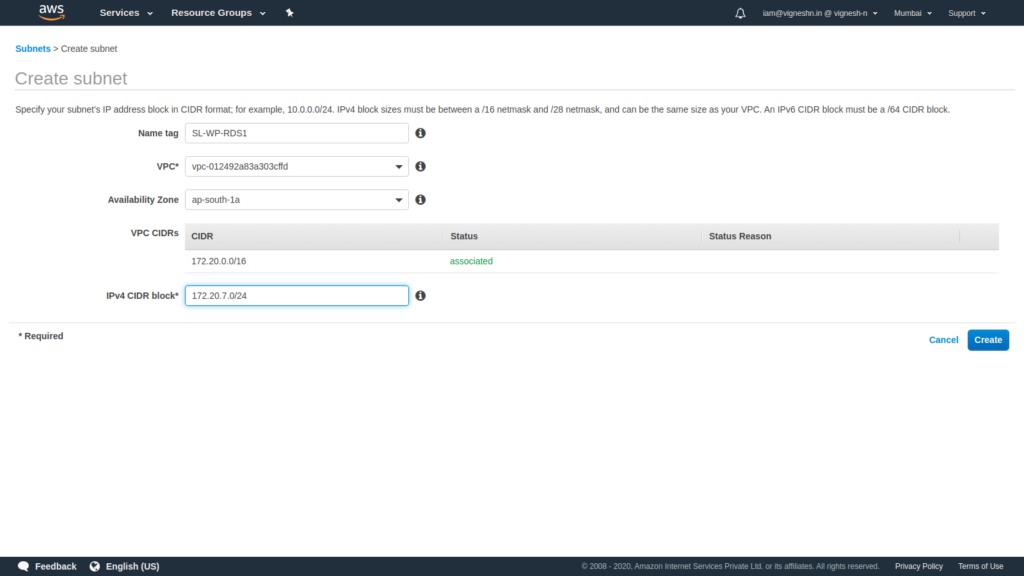
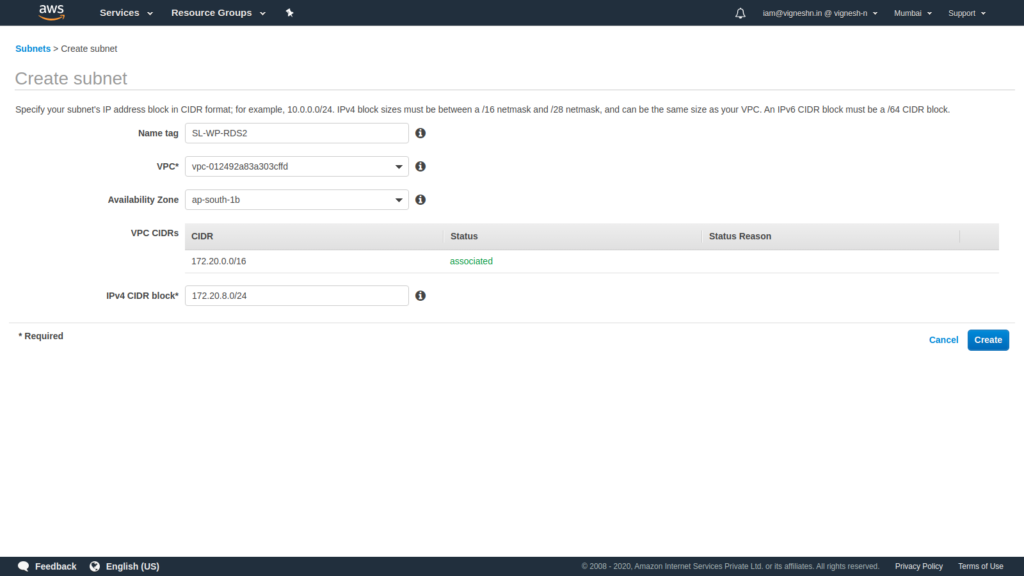
Once all of that is complete, It is time to create an Internet gateway.
To create an Internet gateway, open VPC console and click on Internet Gateways and click Create internet gateway.
Enter a name for the internet gateway, and click Create internet gateway.
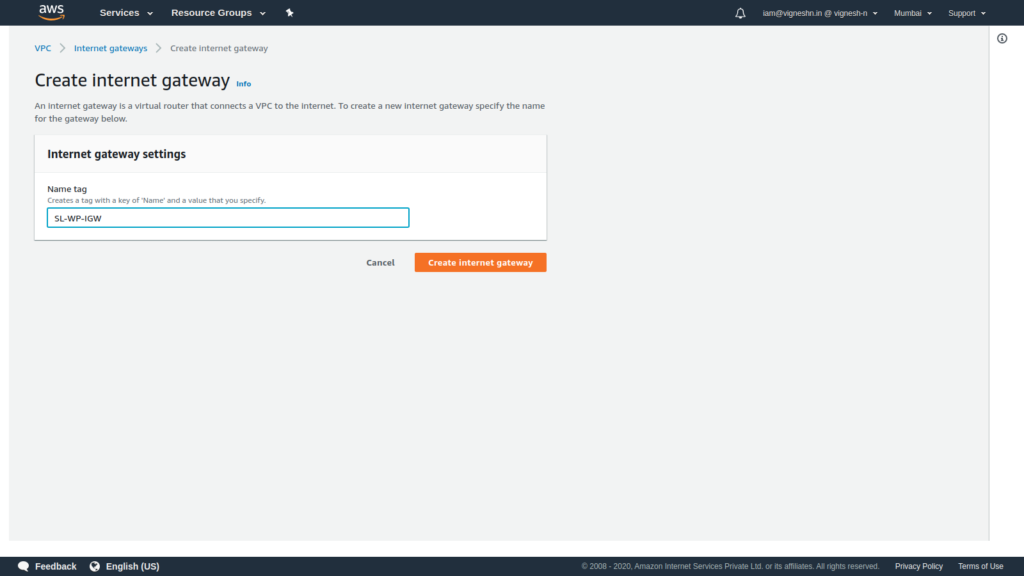
The internet gateway is now created as shown below. Now it should be attached to a VPC
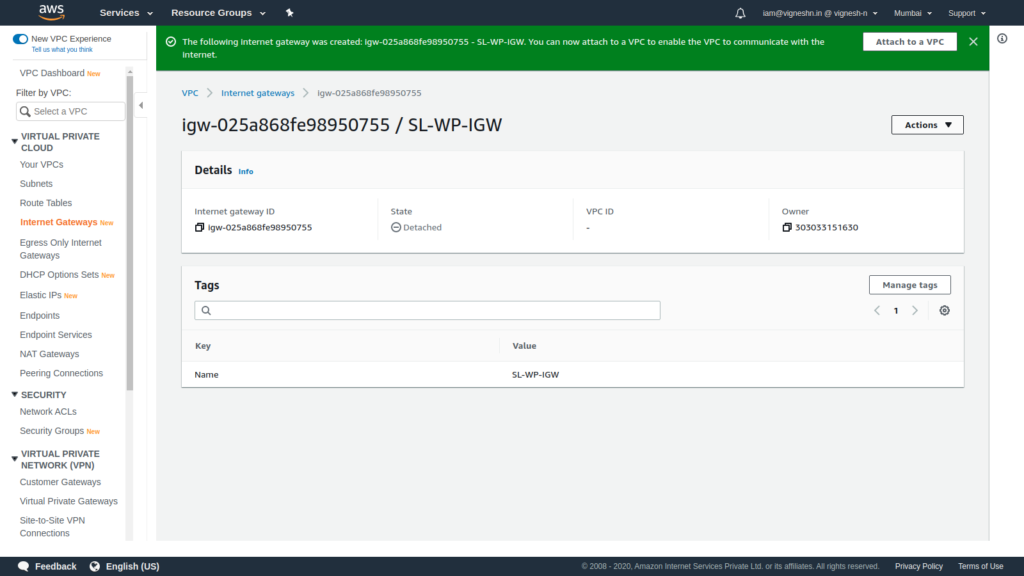
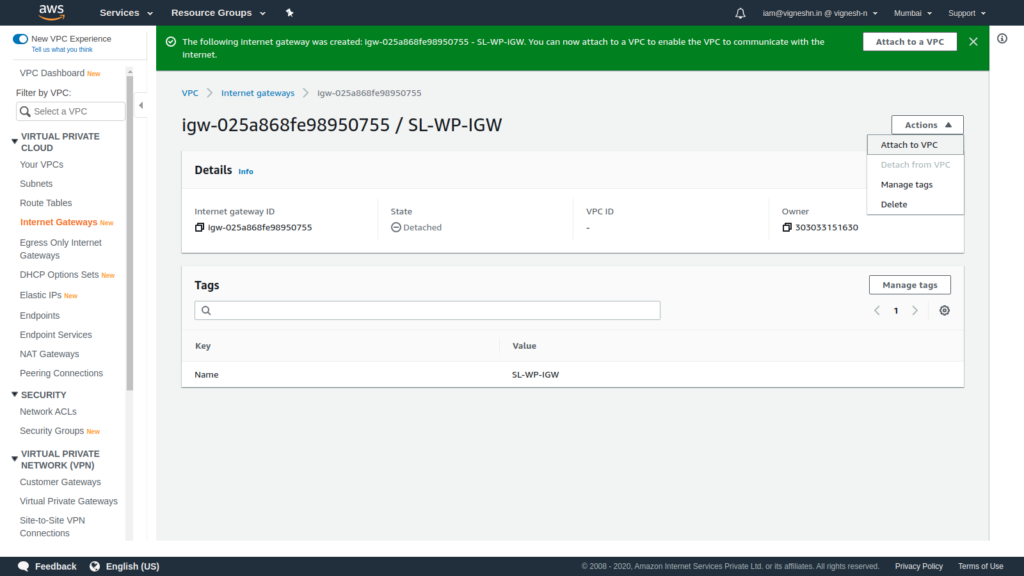
To attach the internet gateway to a VPC, click on Actions and click on Attach to VPC
Select the VPC and click on Attach internet gateway
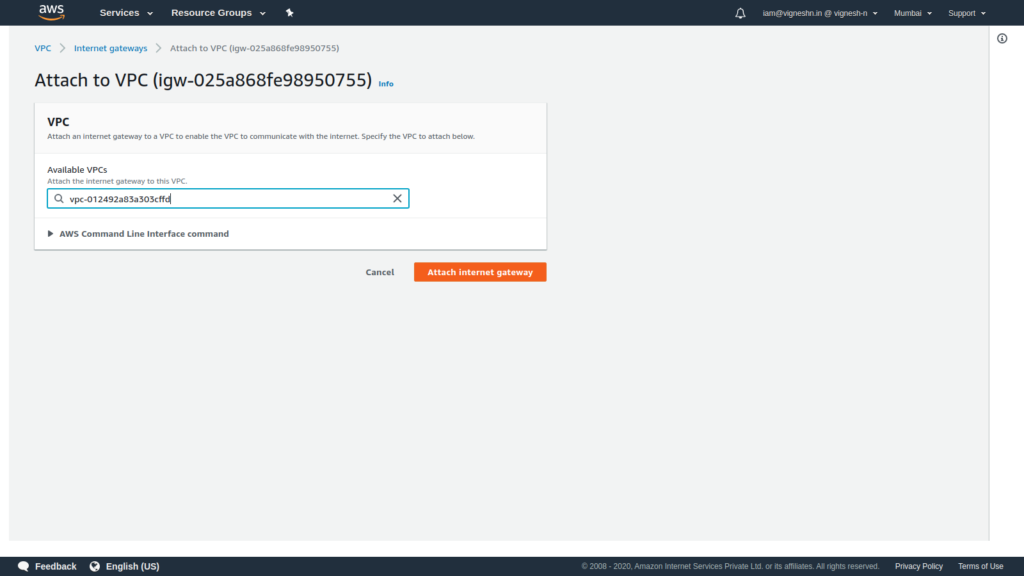
That marks the end of internet gateway setup.
Once that is done, the next step is to create two route tables.
One for Public internet access via the internet gateway using a public IP and another for private access only.
This acts as an extra layer of security over the security group so that resources like EFS and RDS that does not require internet access at all can stay in a private network even if they have a public IP or publically resolvable DNS name.
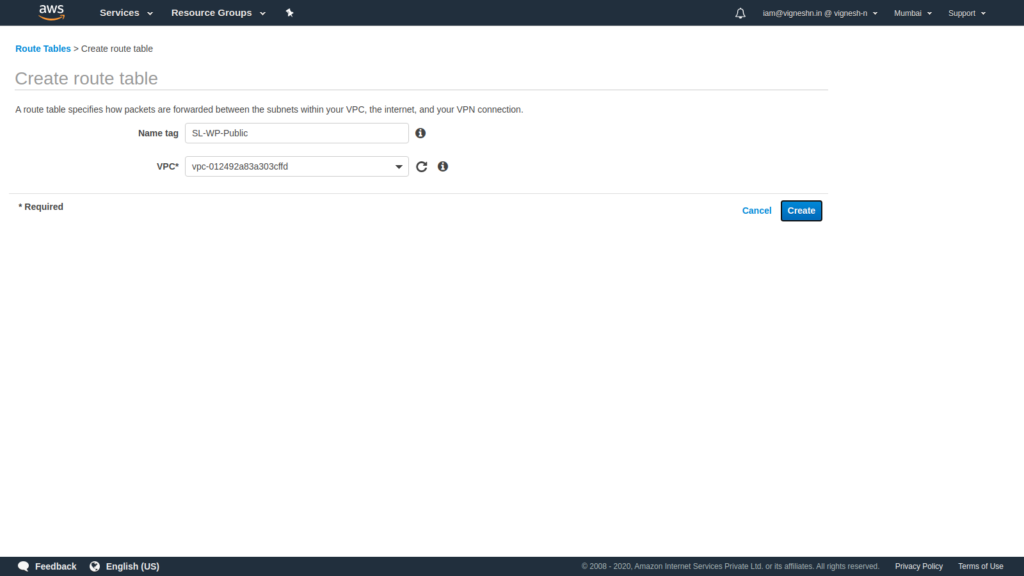
We shall start with a Public route table. Use the route tables section in the VPC console to create the route tables.
Here we mention the route table name as Public and specify the VPC and click create
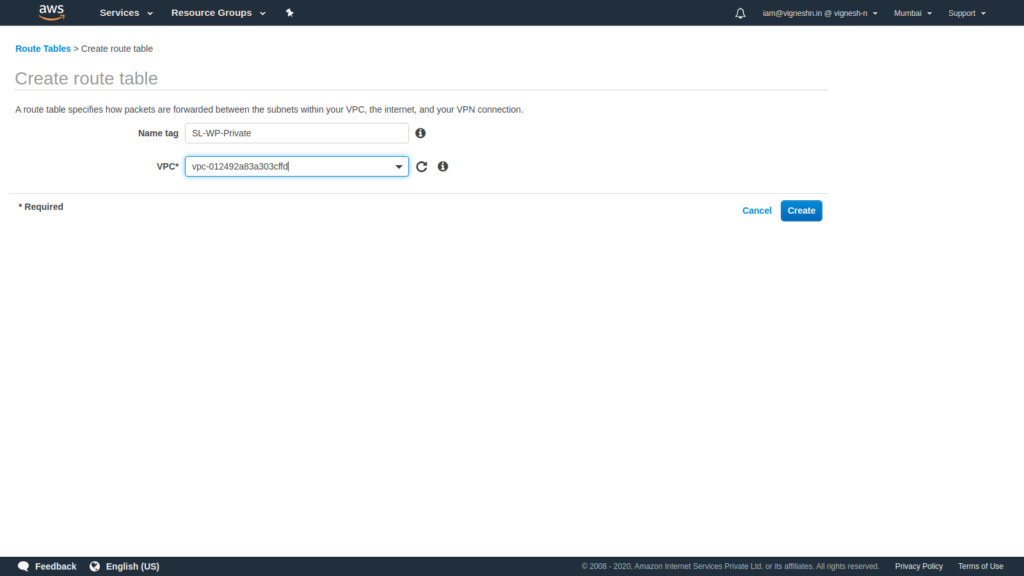
We then repeat the same process as before to create a Private route table. It is always recommended to not use the default route table of a VPC and instead create a separate public and private route table.
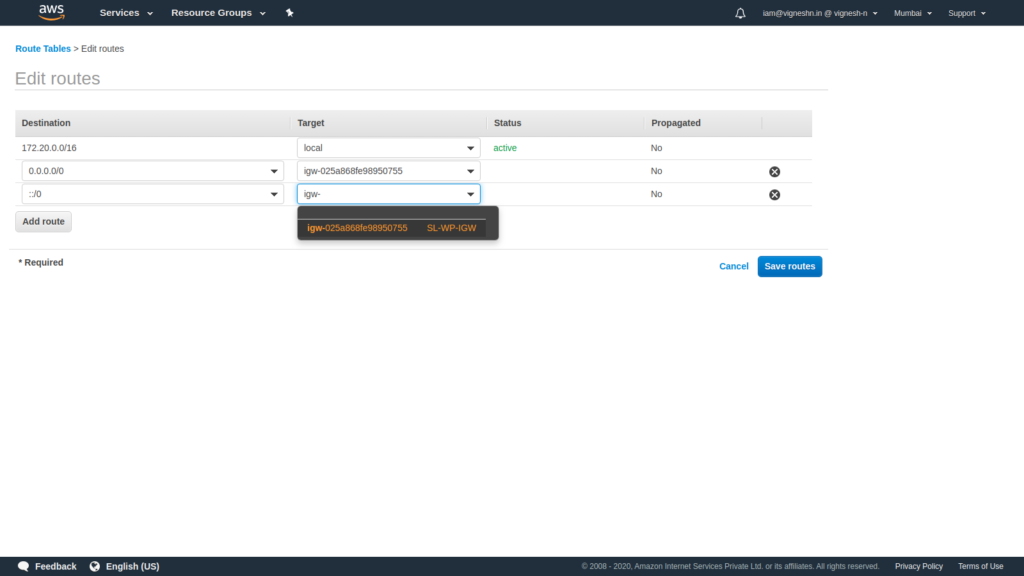
Next we add the routes to the public route table with the routes to ipv4 0.0.0.0/0 and ipv6 ::/0 going through the internet gateway
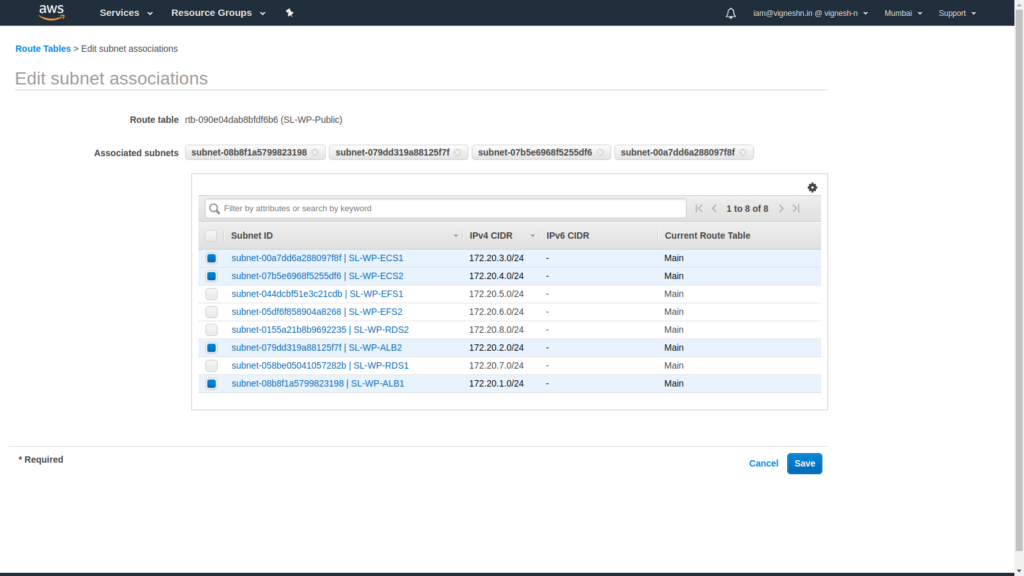
We then associate the subnet that required internet access to this public route table.
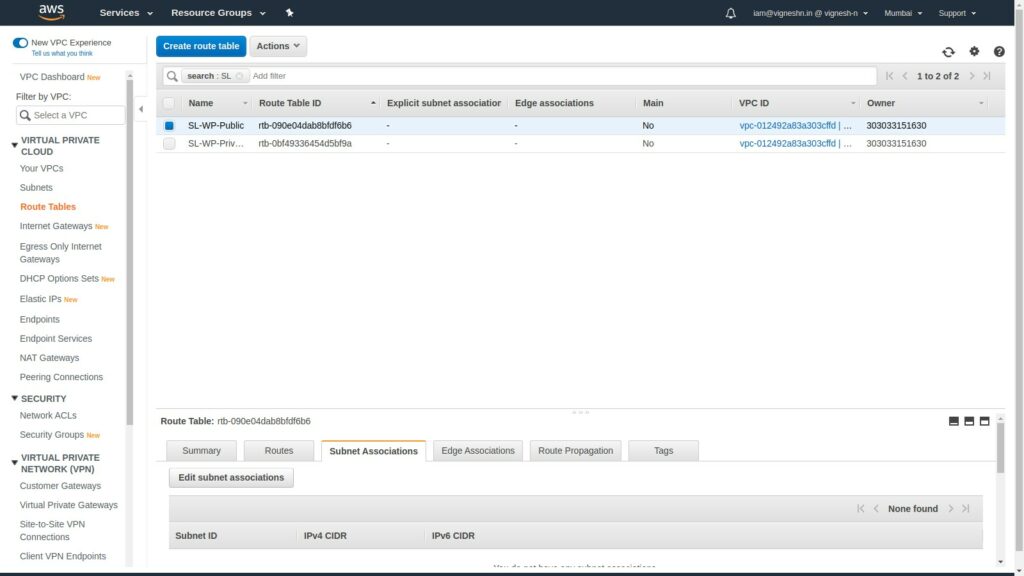
The associations are as shown below and the unselected subnets in the public route table are associated in the private route table to ensure that no subnets are there in the default route table.
That marks the end of the VPC section.
Now we move on to the next mundane, yet most important part – The security groups. Do NOT mess this up!
To create security group navigate to services Tab → Select VPC →click on security group then click on create security group
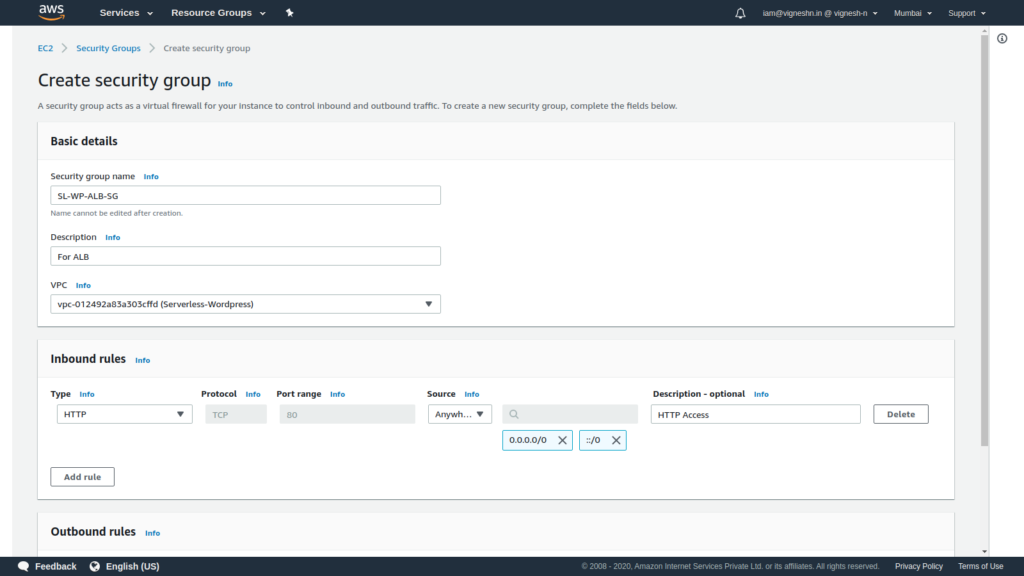
Start with ALB Security group
Enter security group name such as SL-WP-ALB-SG then select the VPC created in first step and give the inbound and outbound rules, and then click on Create security group.
To create security group for ALB the name and description is given and HTTP, and if your are using SSL, then HTTPS ports are made open to public.
Make sure to delete the public open outbound access.
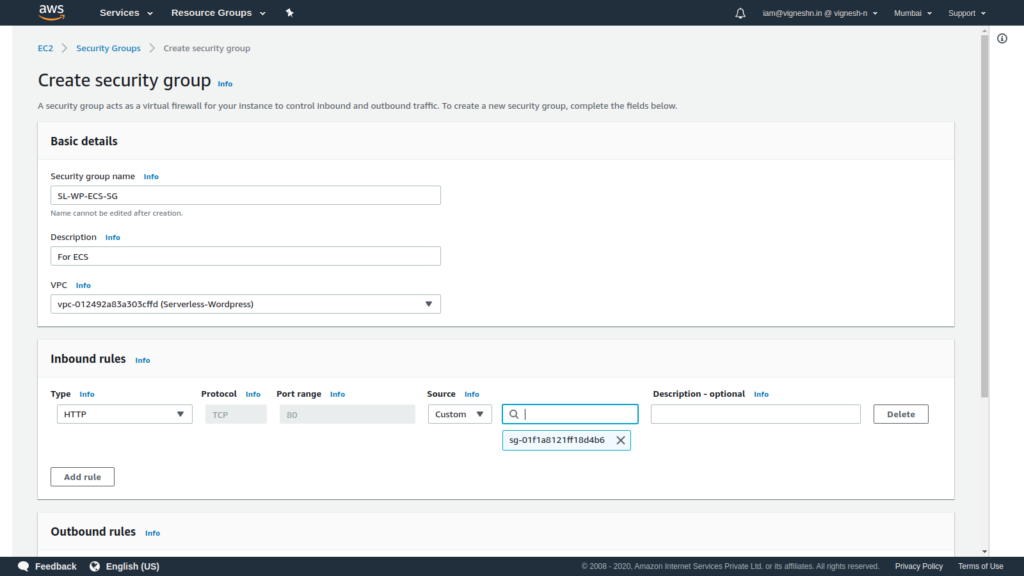
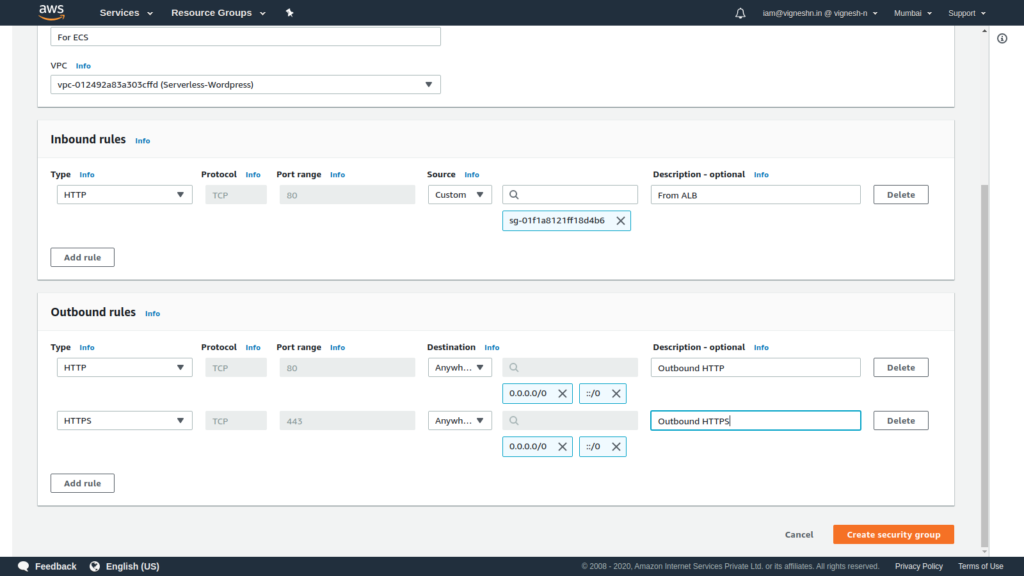
Create the security group for ECS
Allow inbound HTTP from the load balancer
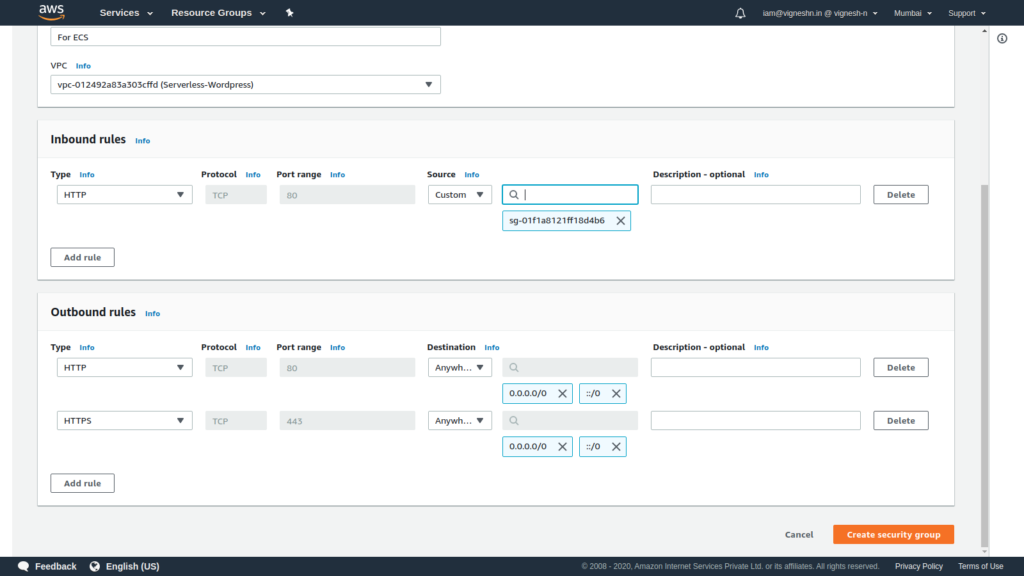
Make sure to delete the outbound public rule and add HTTP and HTTPS access to public from the ECS. Also it is good to label the security group rules for future reference.
Next create the security group for EFS.
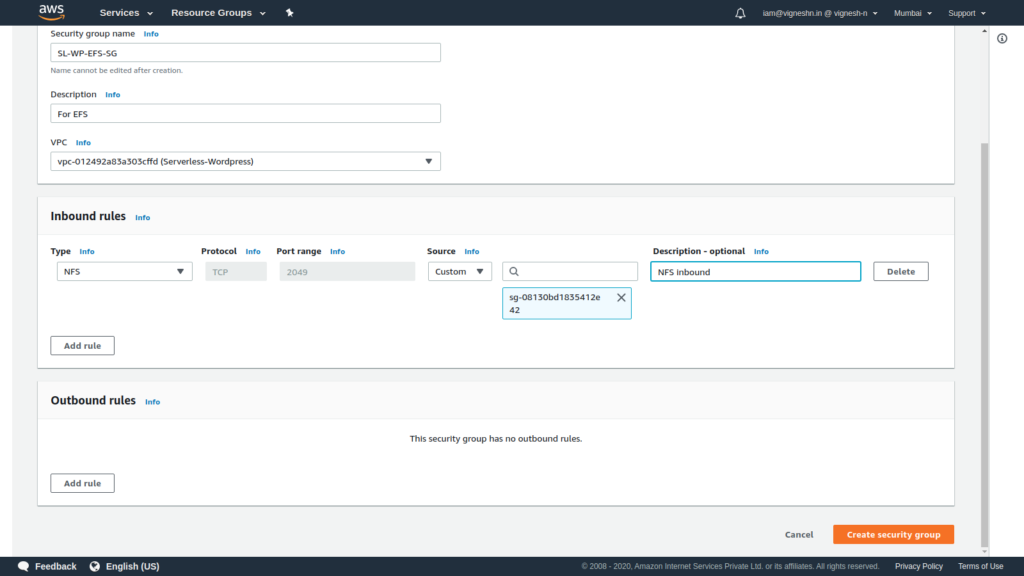
Allow NFS inbound from ECS security group in the EFS security group
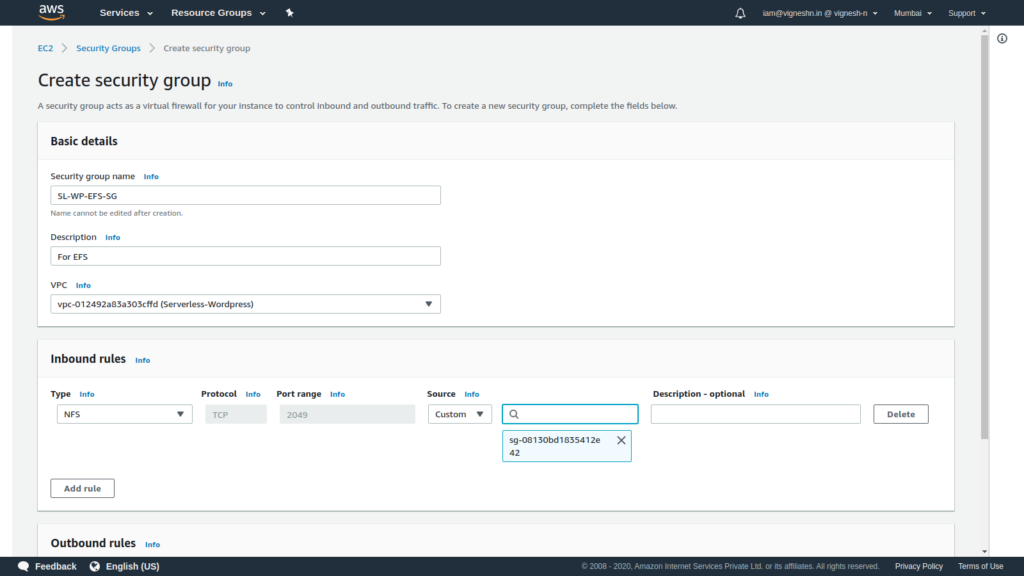
Also remember to delete the outbound public access since EFS does not require any outbound access.
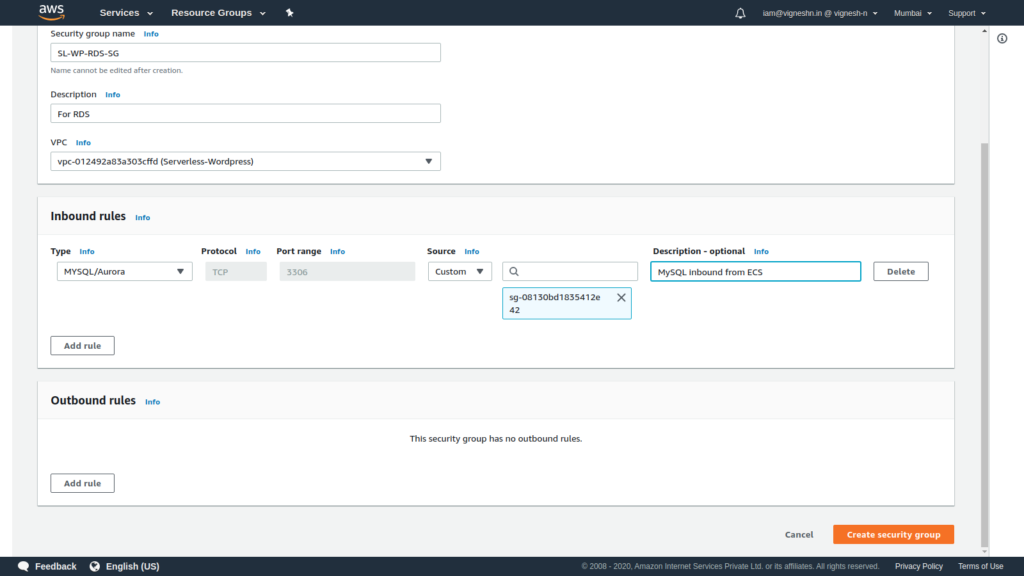
Next create a security group for RDS
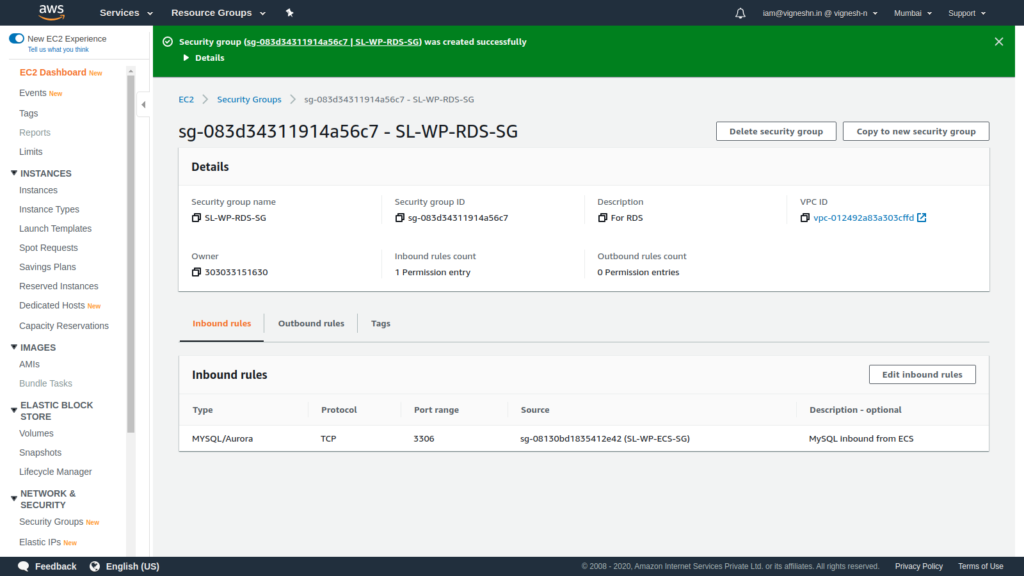
Here only allow inbound MySQL port from ECS.
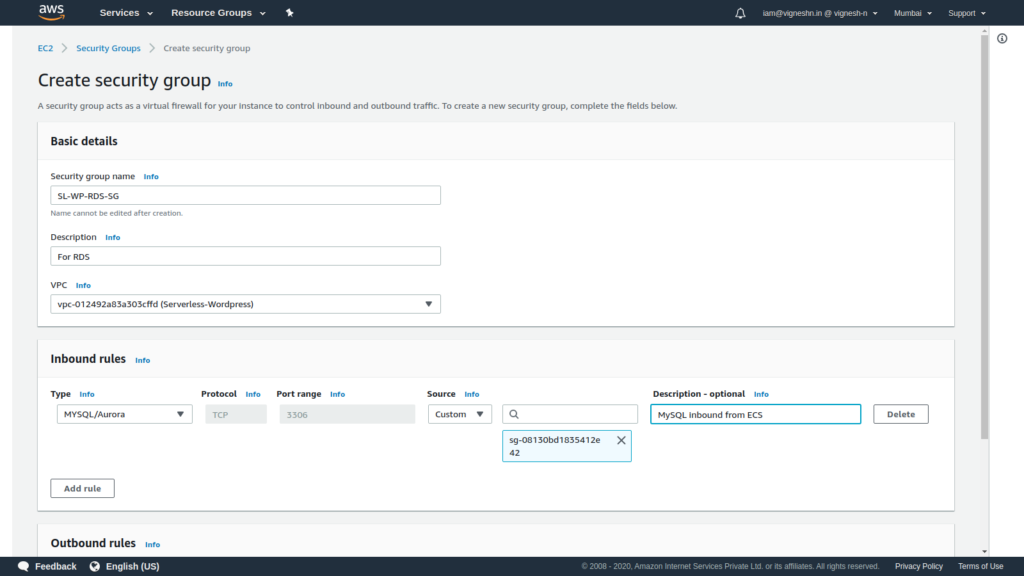
RDS also does not require outbound access and hence all outbound rules are removed.
And below is the screen that is shown when you successfully create a security group.
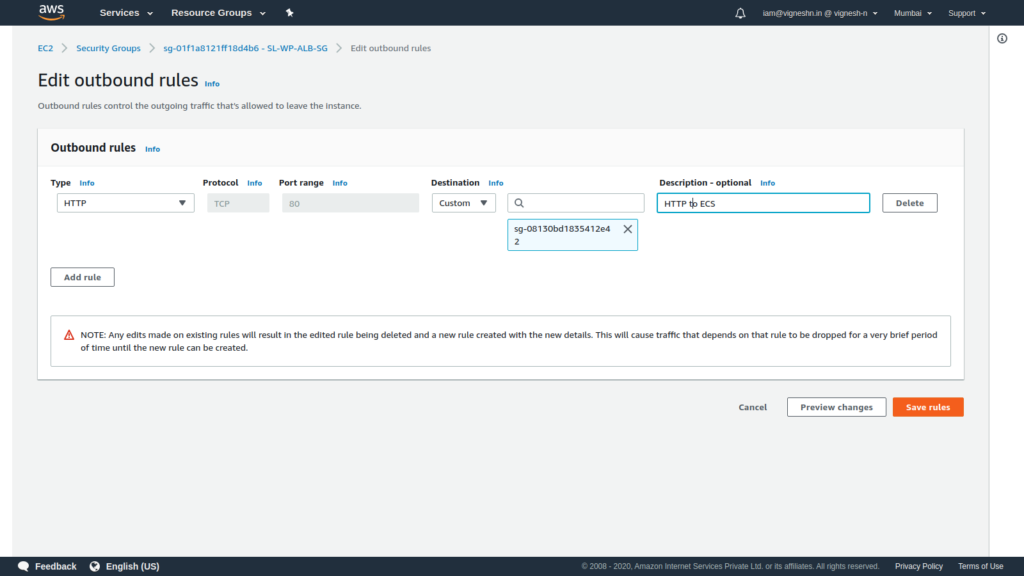
Now we backtrack and add the outbound rules for all the inbound security group to security group rule that we created in the previous steps.
We start with ALB and allow outbound HTTP access to ECS
We also add the outbound NFS and MySQL security group access to ECS security group.
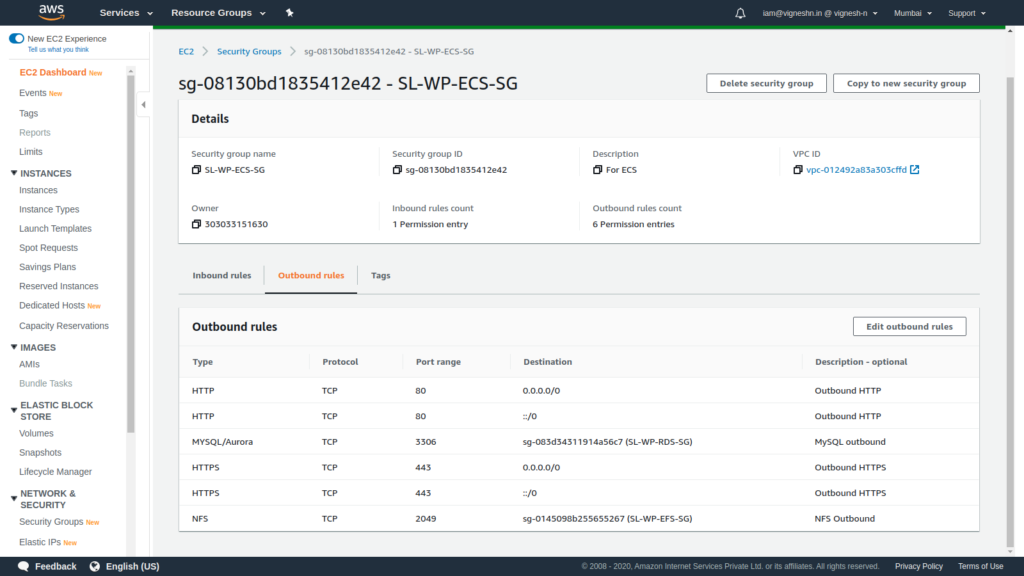
If you have followed all those instructions carefully, you have setup a secure system with the proper security group configuration.
Now that the security groups are out of the way, we move on to the interesting parts. We shall start with an EFS.
We need EFS so that the container that we create can have persistent storage for the WordPress files like uploads, plugins etc.
To create EFS Navigate to Services Tab → Select EFS then click on Create file system
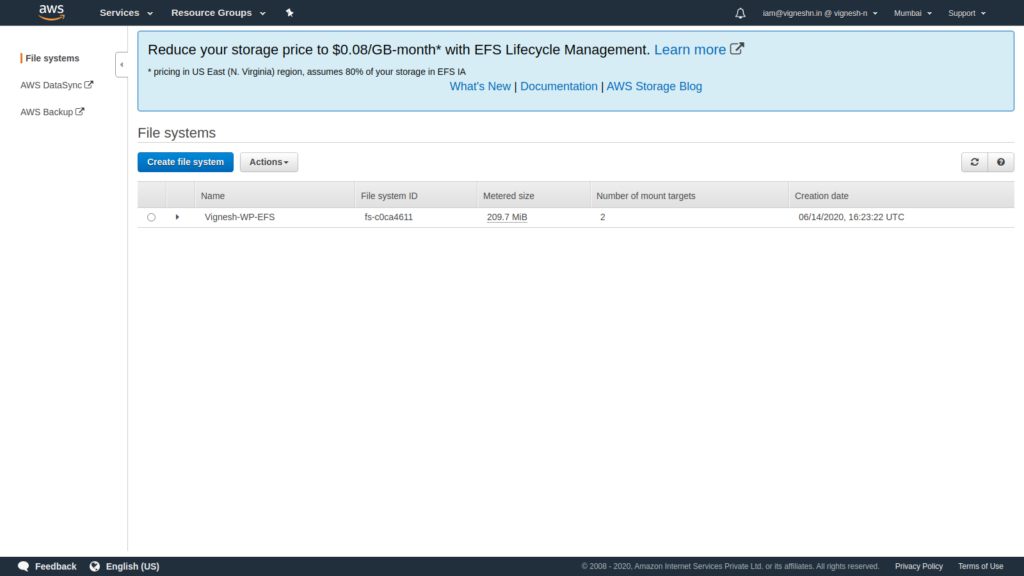
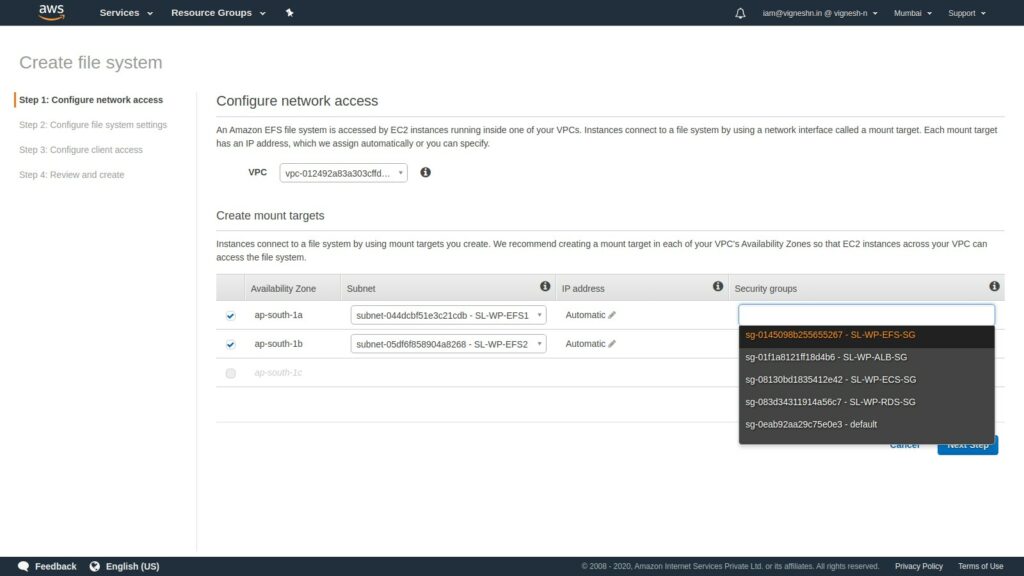
To configure network access Select the VPC created in first step and select subnet and security group created for EFS in previous steps and then click on Next step
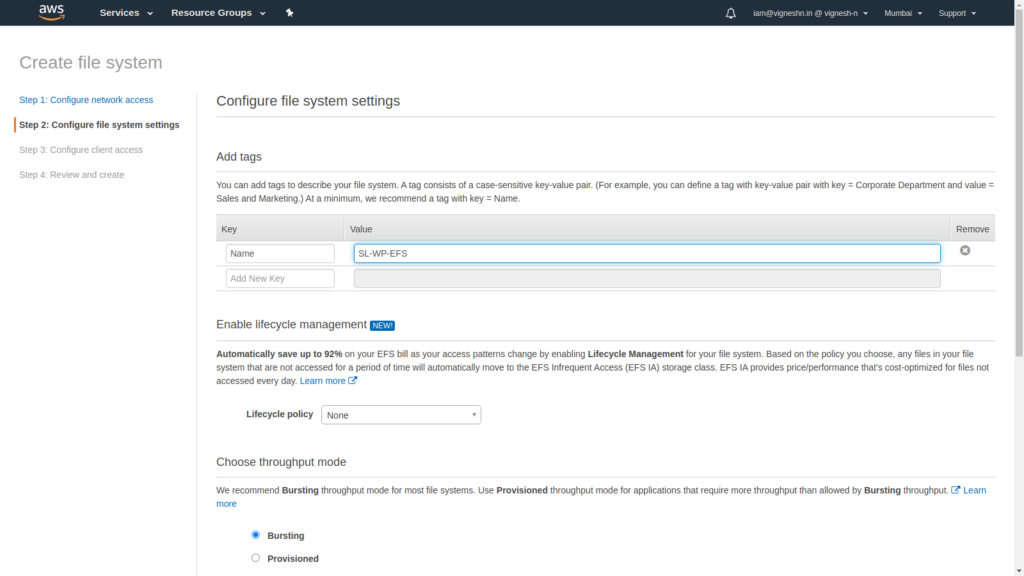
In Add tags, name your file systems in value and then click on next steps.
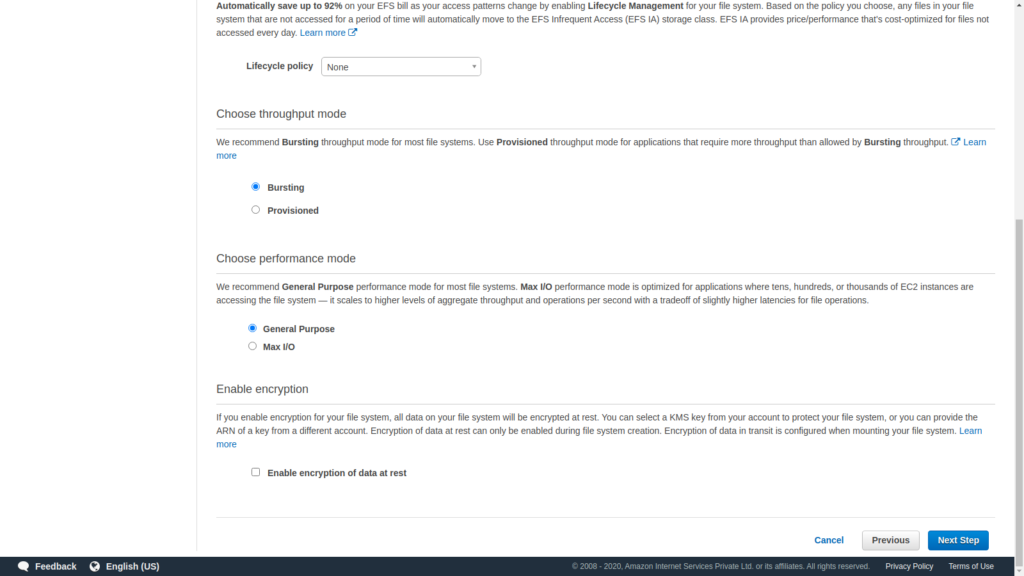
To configure client access, click on add access point then enter user name , directory path as /WP and set User ID , Owner User ID,Group ID, Owner Group ID, Secondary Group IDs as 1000 and Permissions as 755 and then click on Next step.
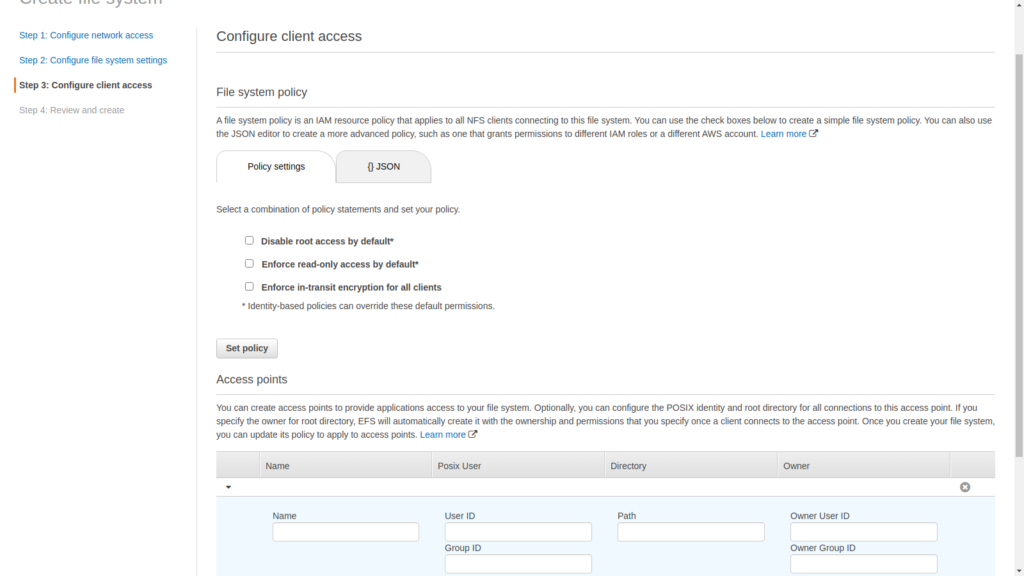
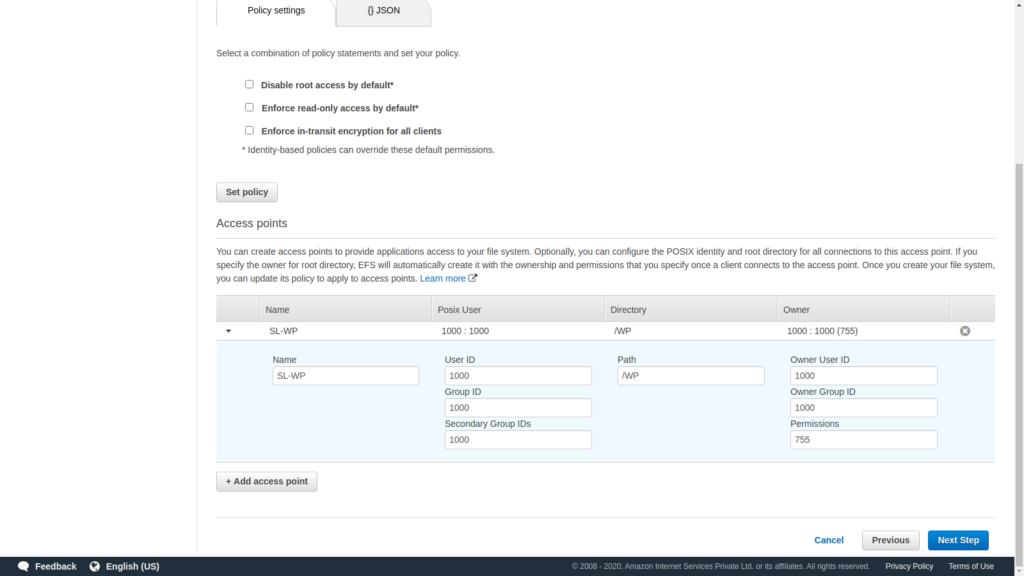
Finally click on Create File System
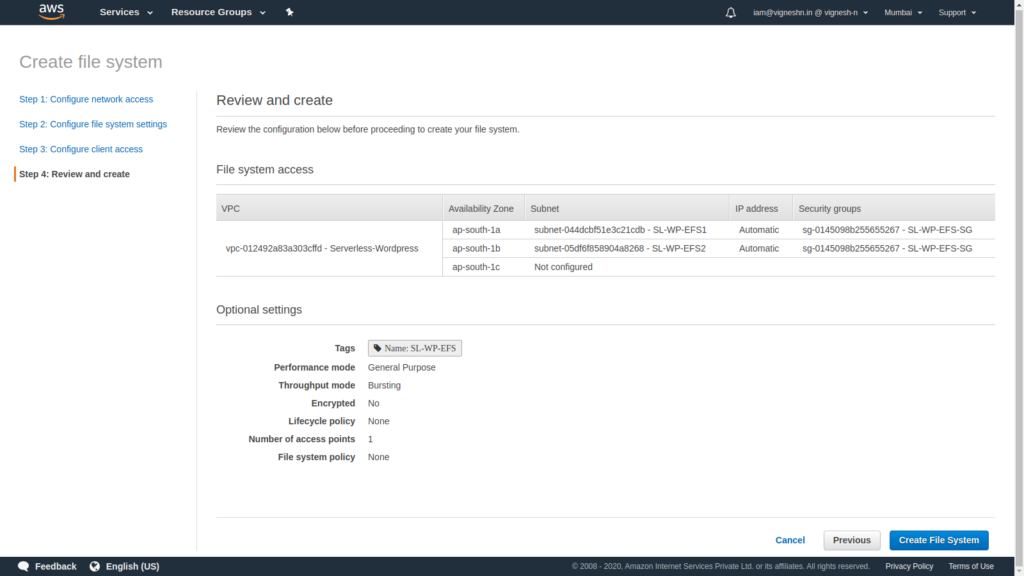
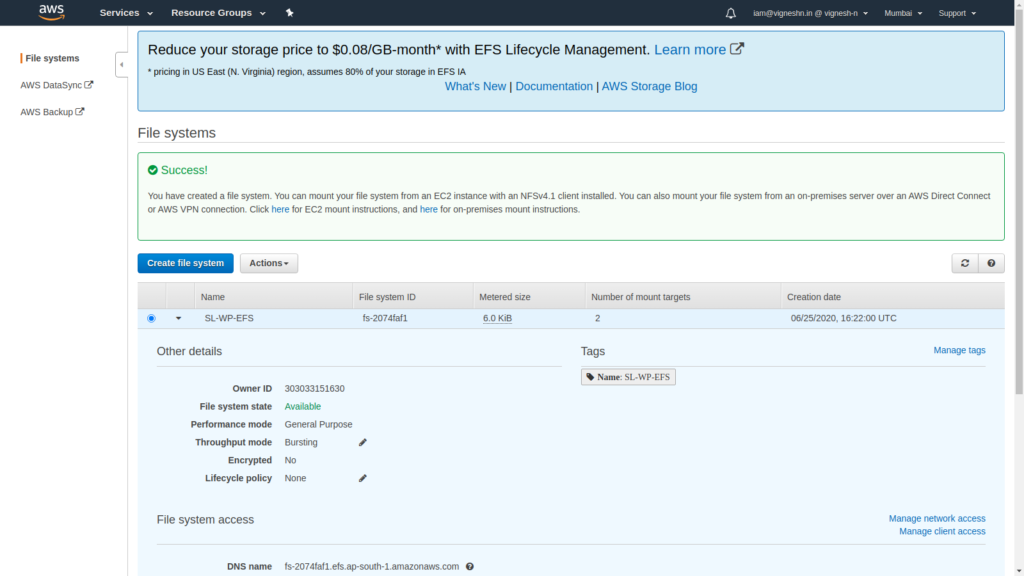
EFS setup is now complete and it’s creation will take some time.
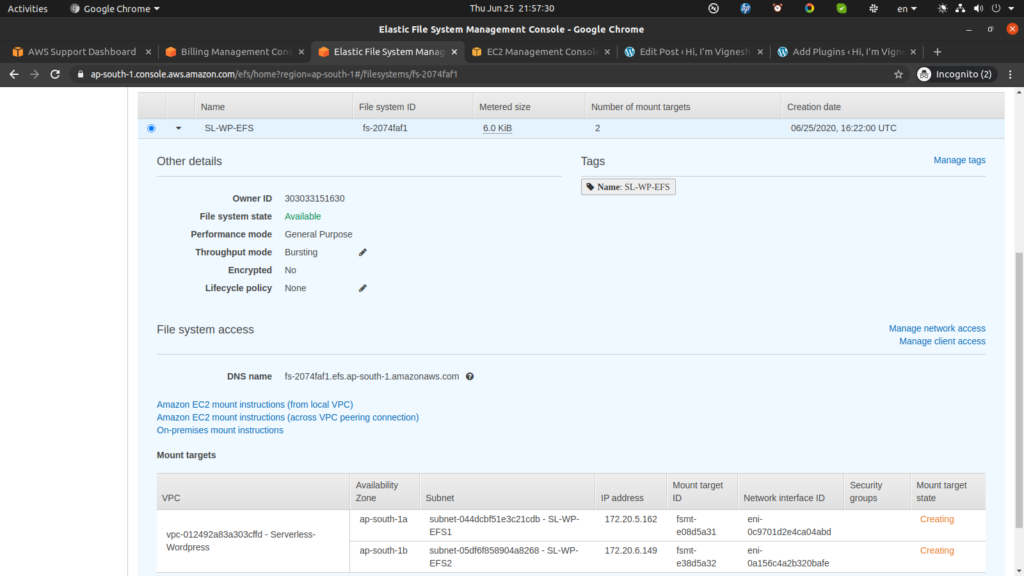
Now while we wait for the EFS creation to complete, we can move on to RDS
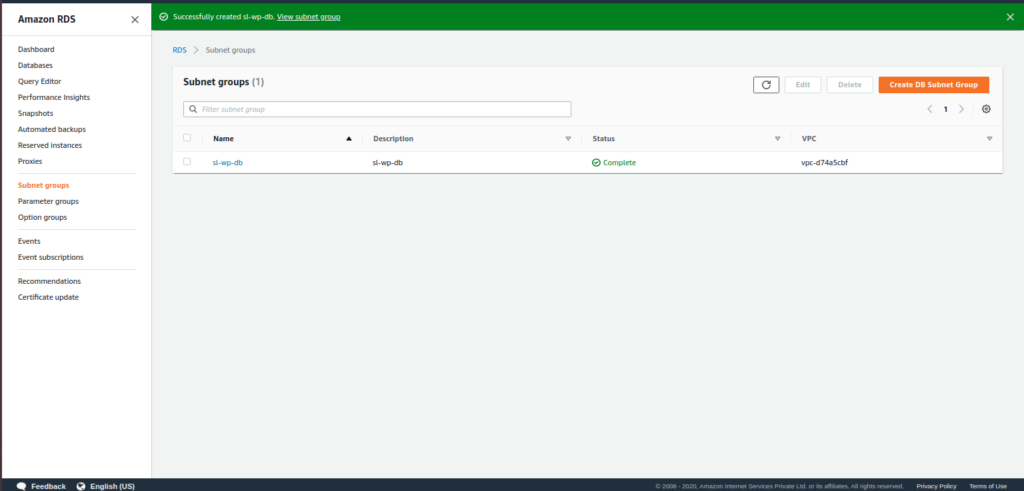
To create RDS we need to create DB Subnet group for this navigate to Services Tab → Select RDS.
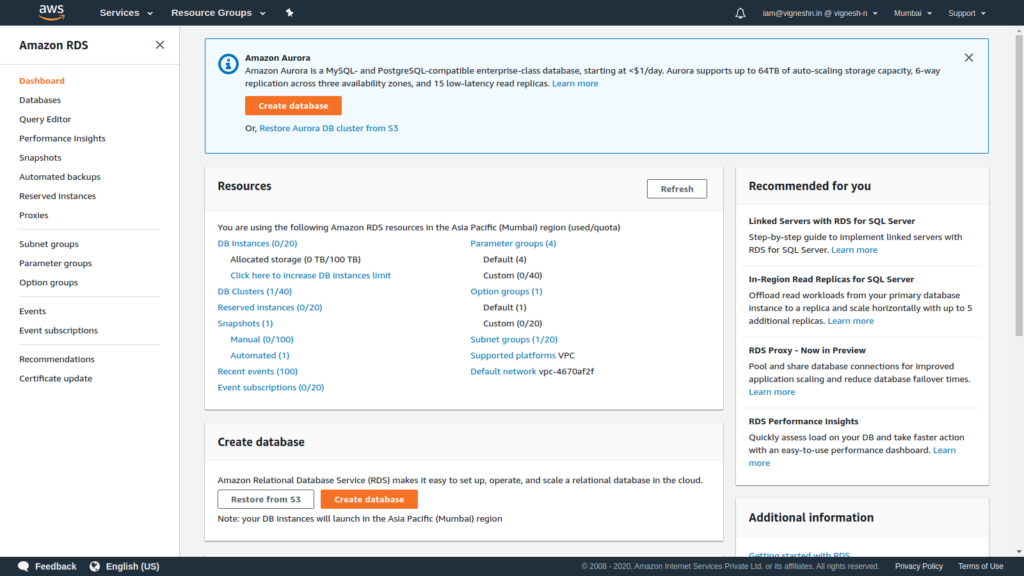
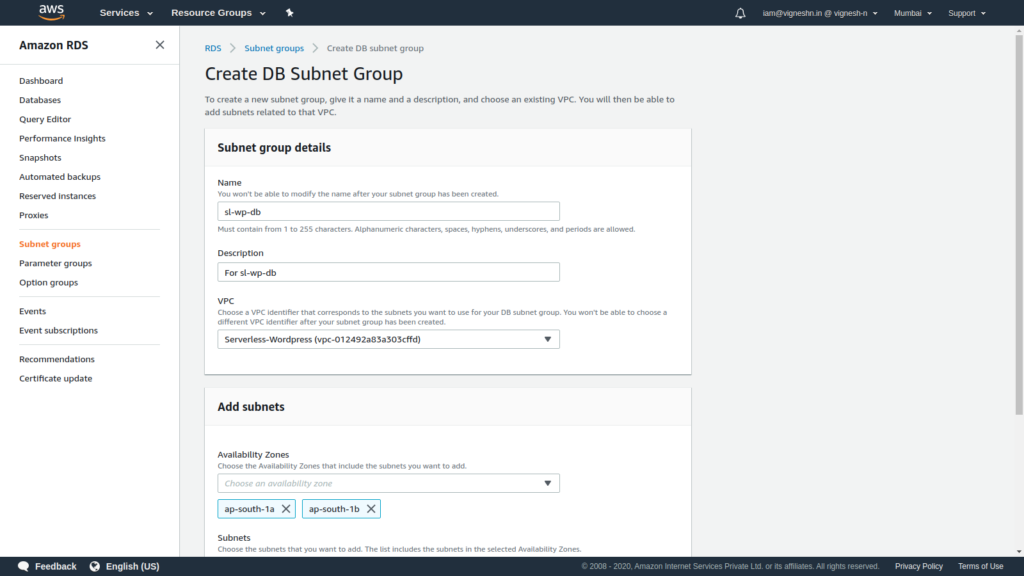
Then click on subnet groups to create DB subnet group,enter subnet group name such as sl-wp-db and descriptions, select the vpc created in first step.
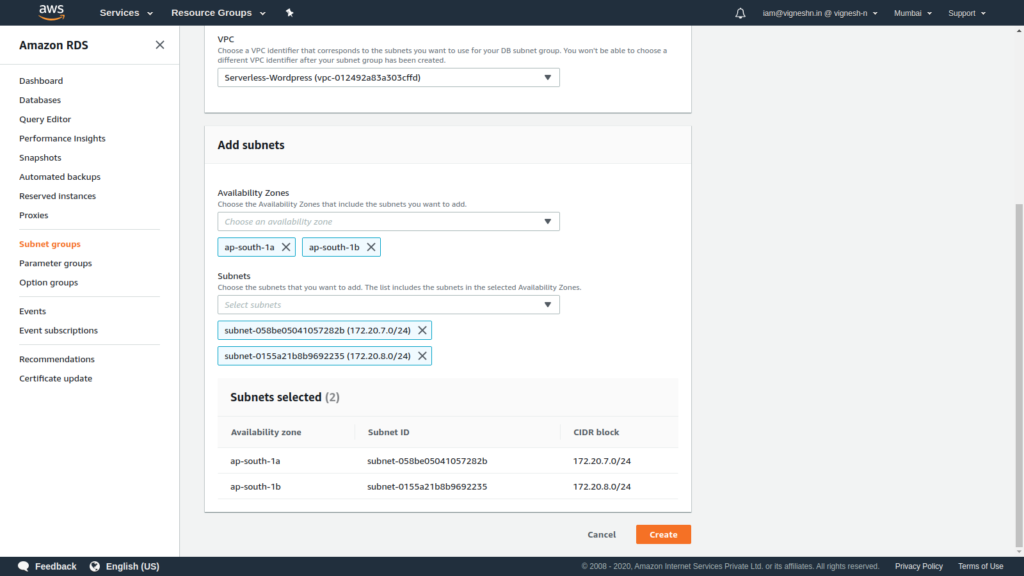
In Add subnets select two availabilty zones corresponding to two subnets created earlier for RDS and then click on create.
Make sure the subnets are in ap-south-1a and ap-south-1b since Aurora serverless is supported only in those two availability zones in the Mumbai region when I tried to set it up.
After successfully creating subnet group , click on databases options on the left side then click on create database
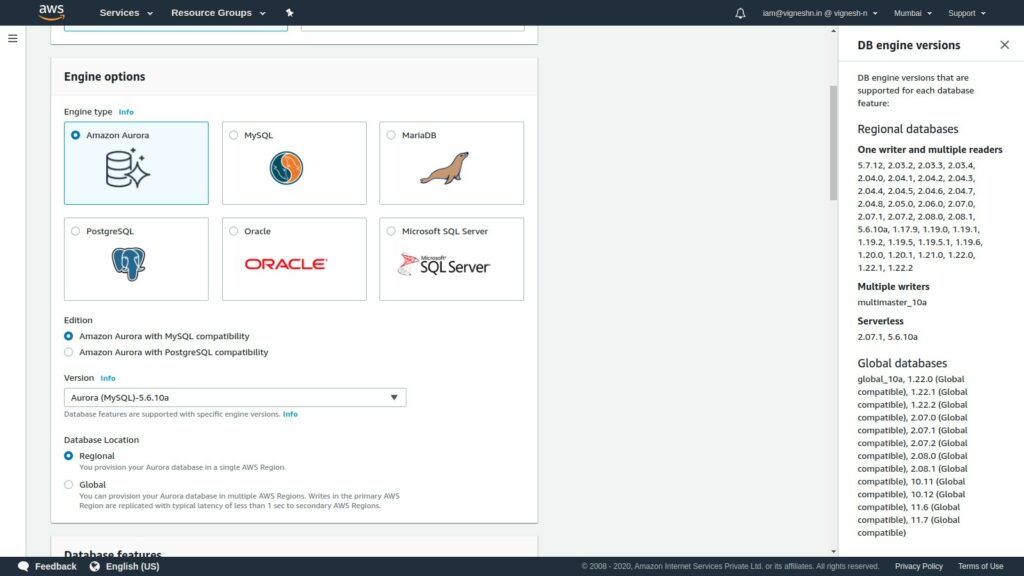
Choose a database creation method as standard, then select engine type as Amazon aurora and the DB version as 5.6.10a or 5.7-2.7.1 as serverless only supports those two versions and remember to choose Serverless
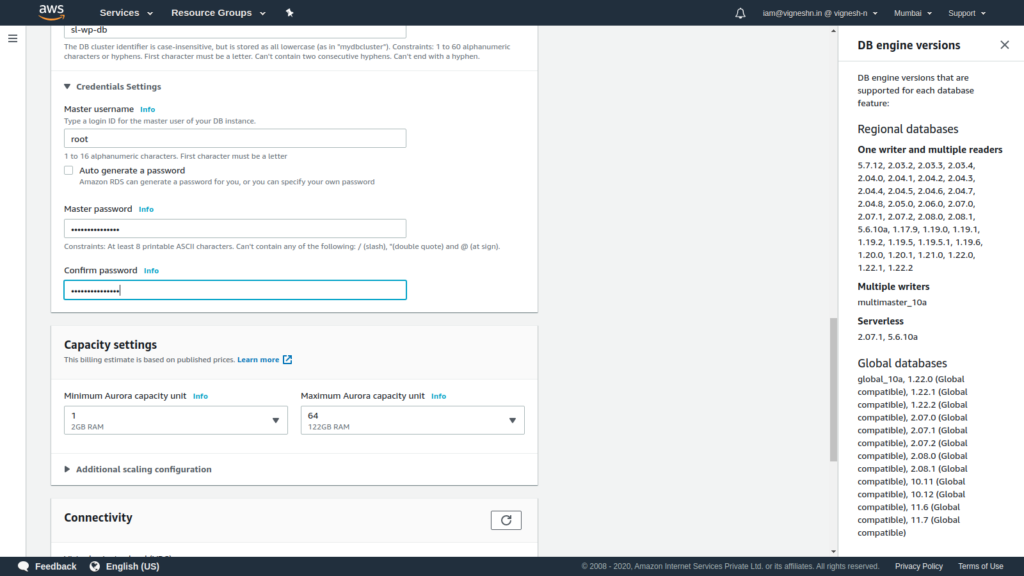
In DB cluster identifier enter db name and credentials settings enter db username and db password. You can also select the required minimum and maximum capacity
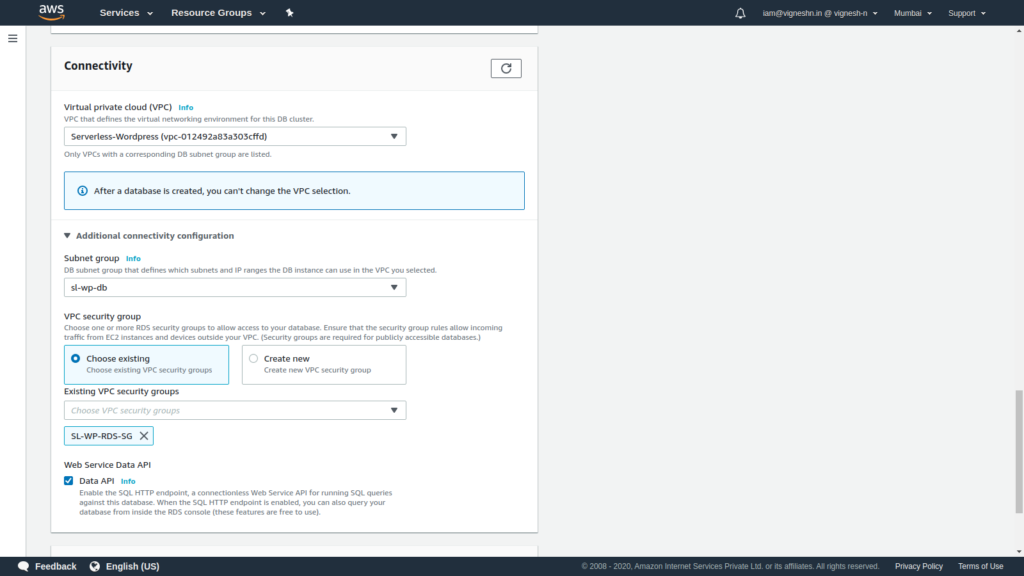
Select the VPC and choose security group as existing group and select the security group created for RDS in connectivity. You can also enable the Data API which allows running queries from the AWS console. It is also free of charge.
You can create an initial database called wordpress.
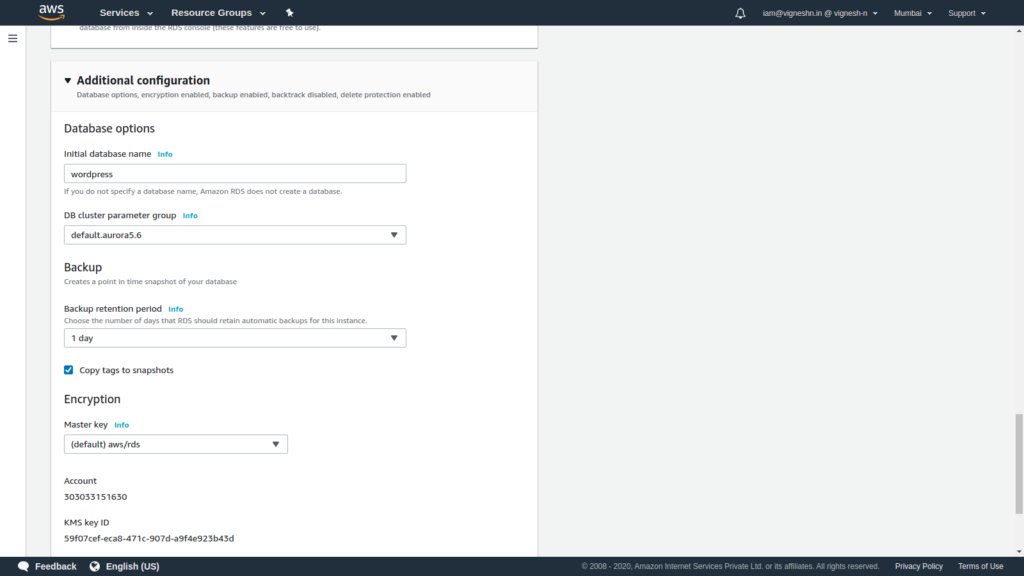
Then click on create database.
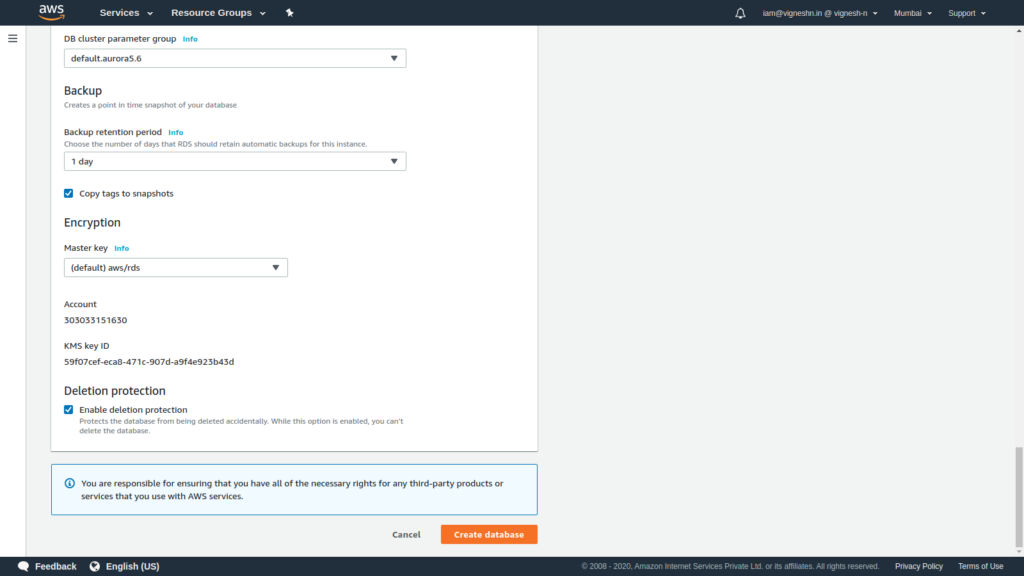
Now the RDS setup is complete and it will take some time to be available.
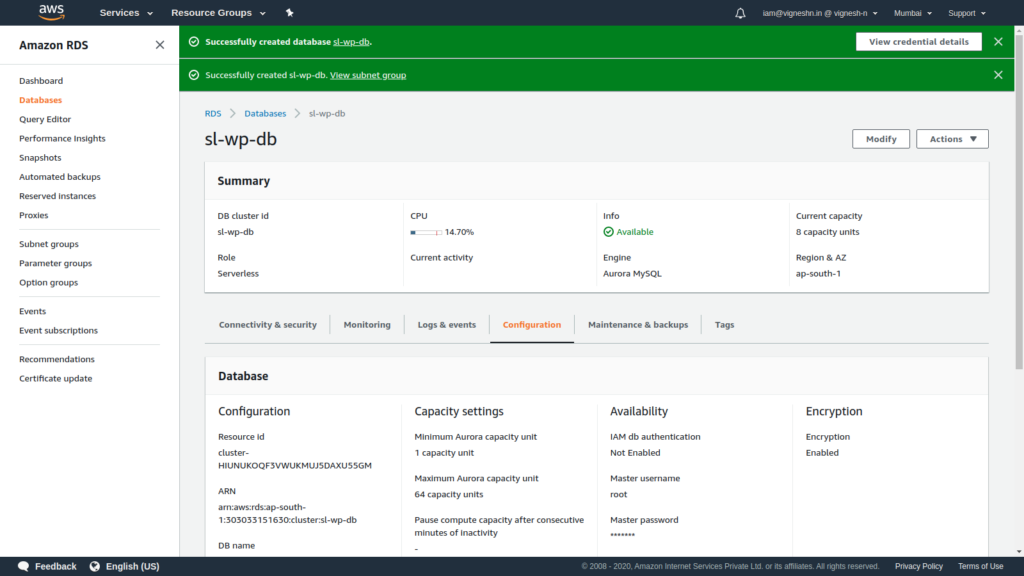
Now the RDS is being created and it might take some time. So we will setup the ALB during this time
Go to the EC2 Console and click Load balancer
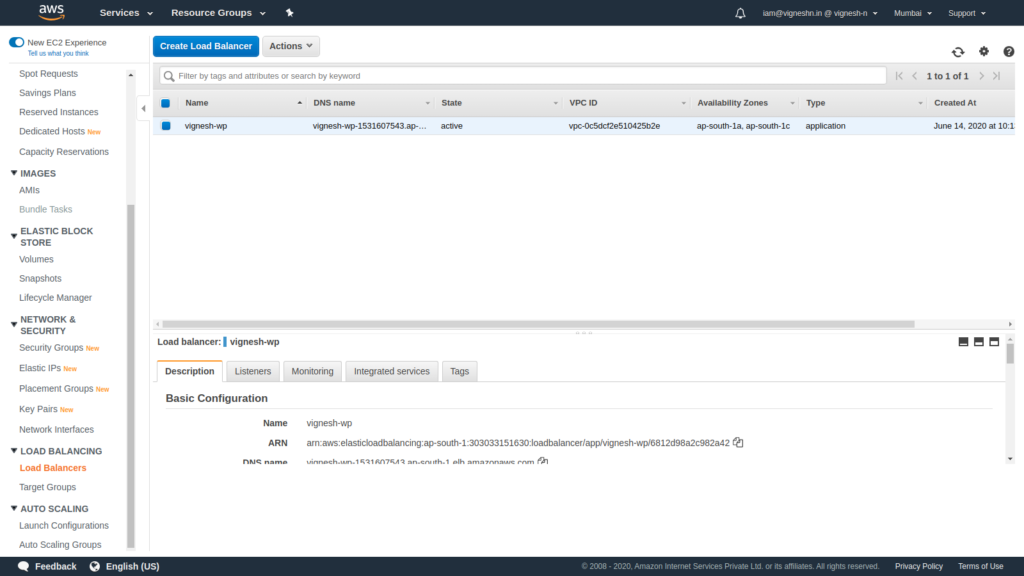
Create an Application load balancer
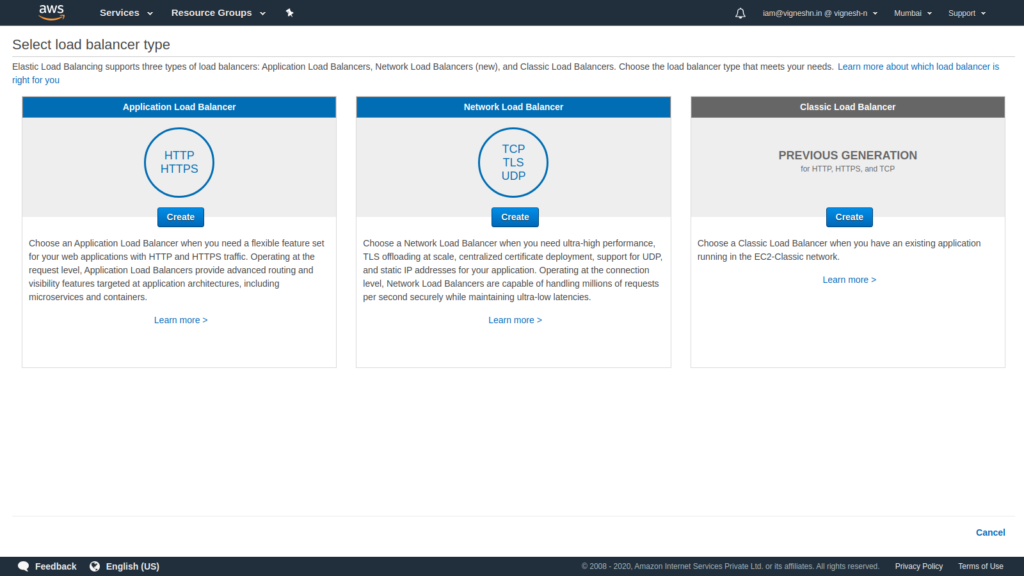
Since I am not adding an SSL and mapping a domain, I am only going to use an HTTP (80) listener.
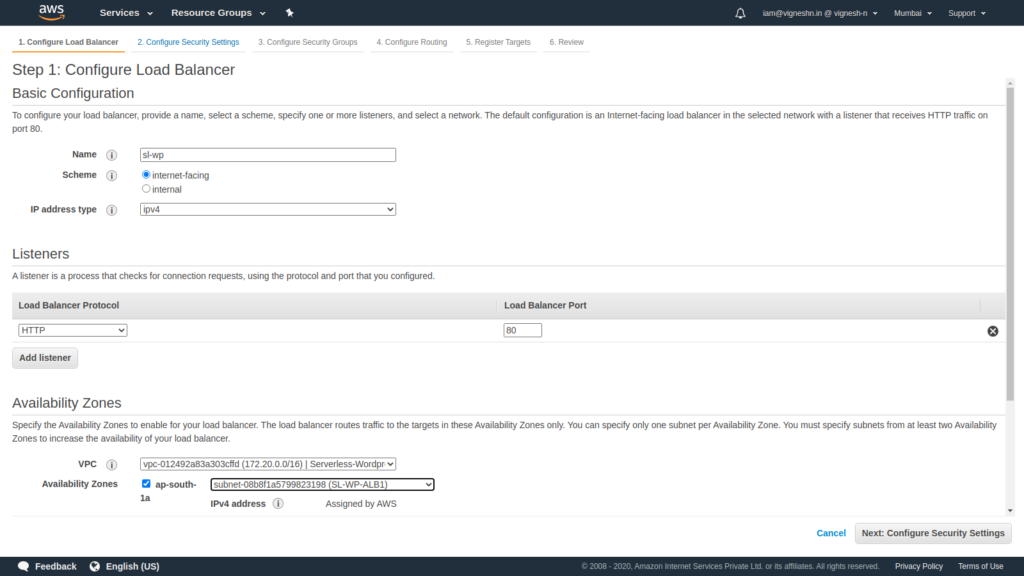
Choose the right VPC and the subnets that we created previously for ALB.
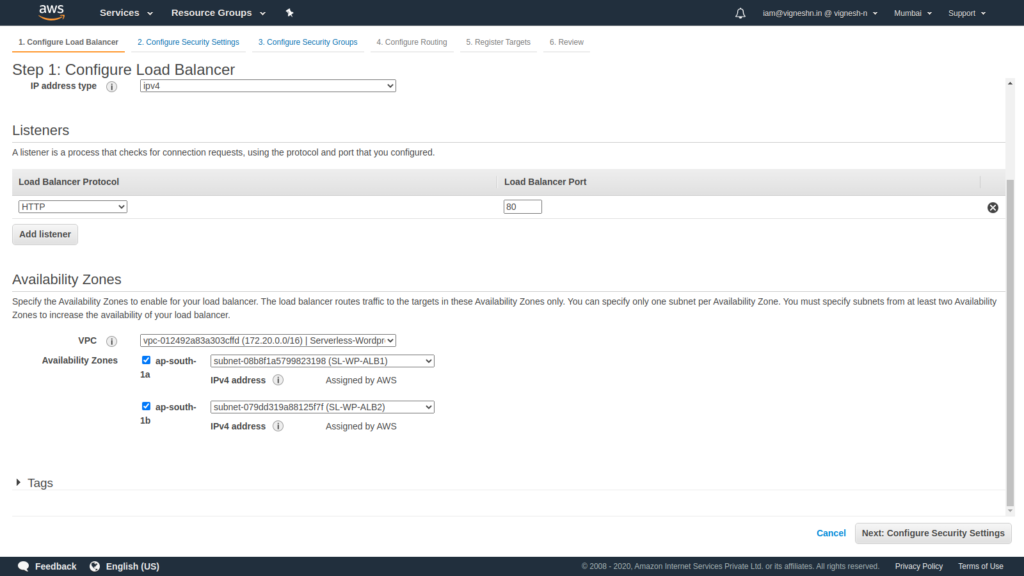
In the next window you will see this error, this is because we did not enabled HTTPS. If HTTPS listener was enabled, this will be where you specify the SSL certificate and the security policy for SSL.
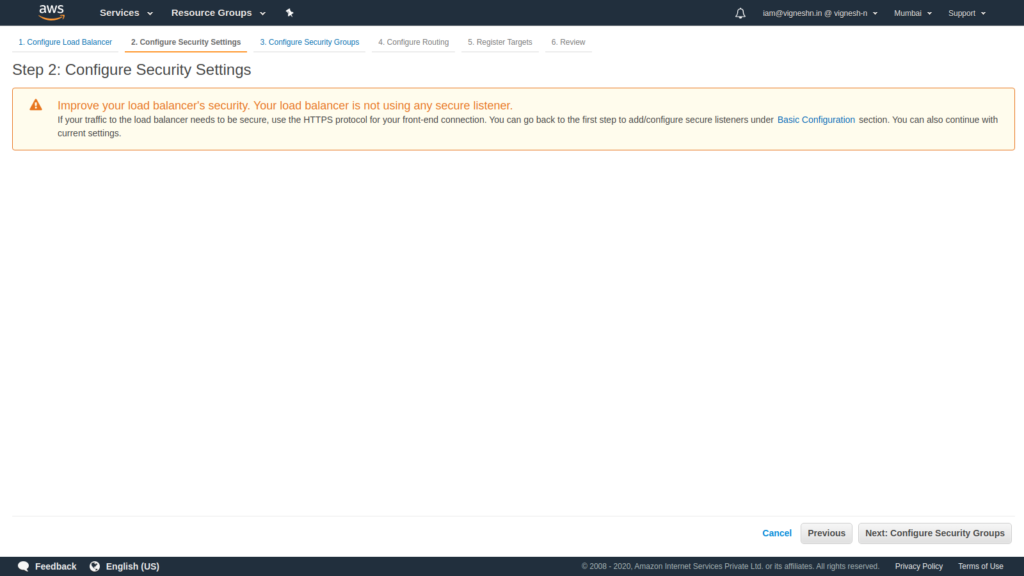
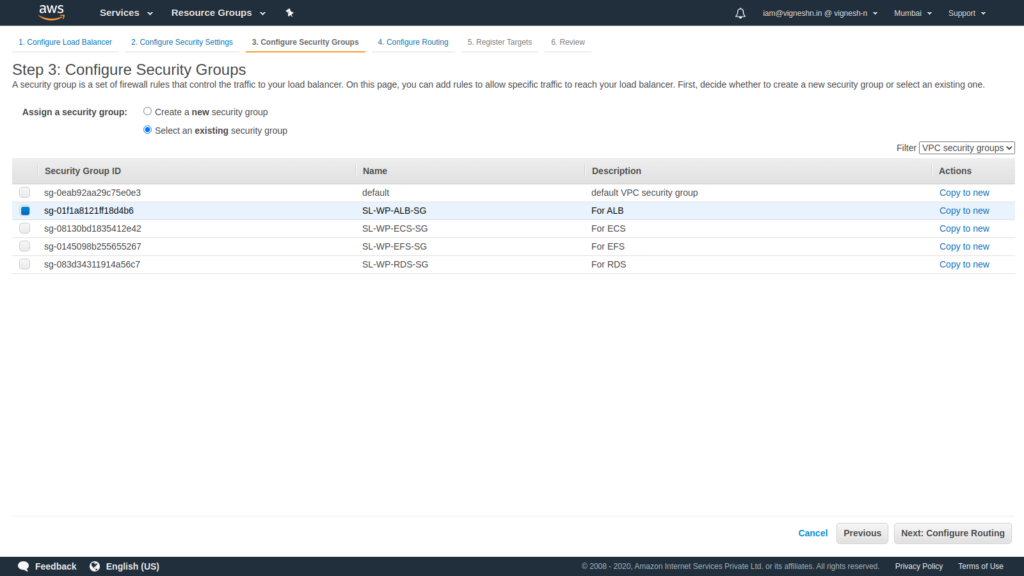
On the next page, specify the security group that we created for ALB.
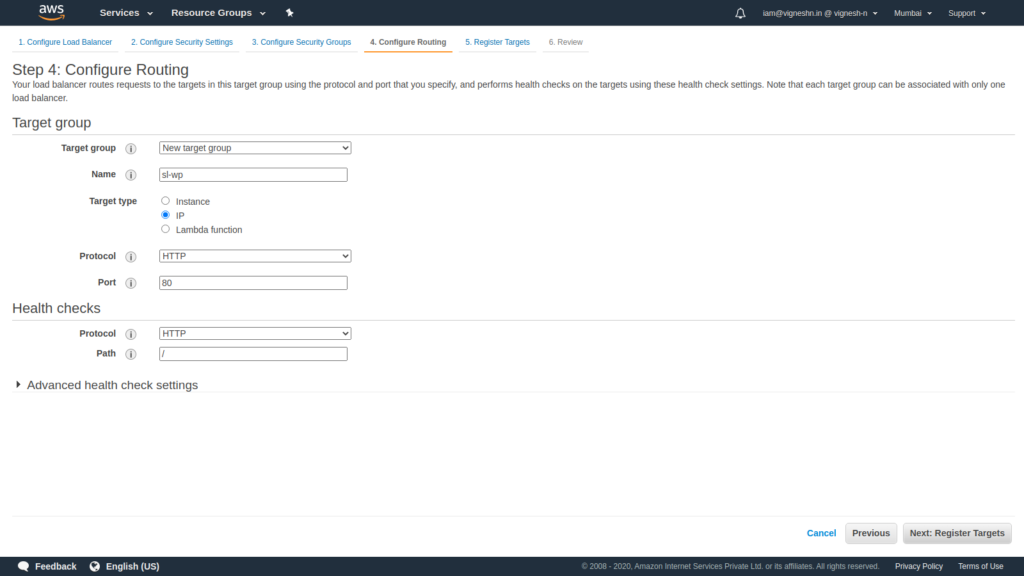
Next create a target group with IP target type.
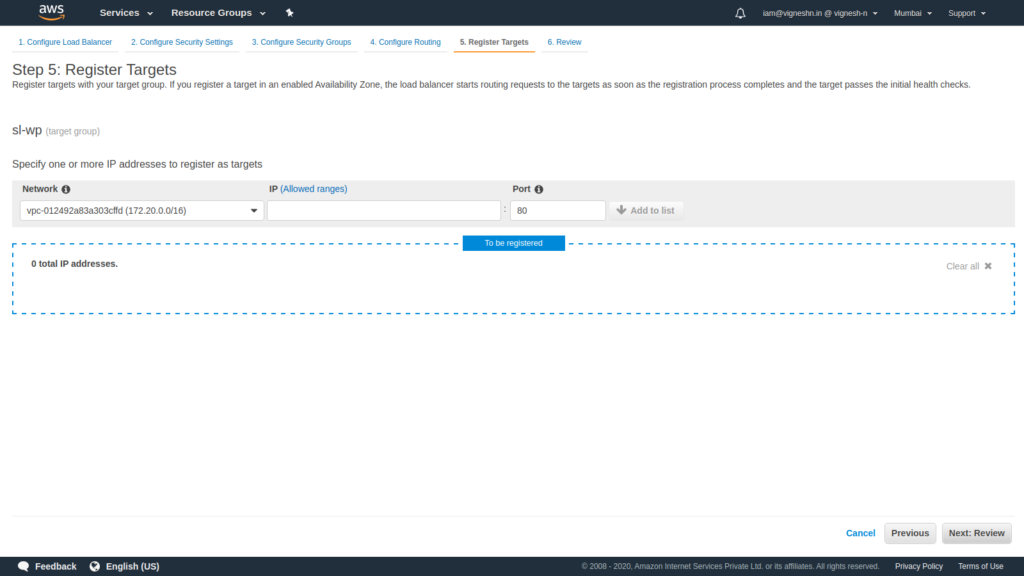
Skip the step to add targets
Review your settings
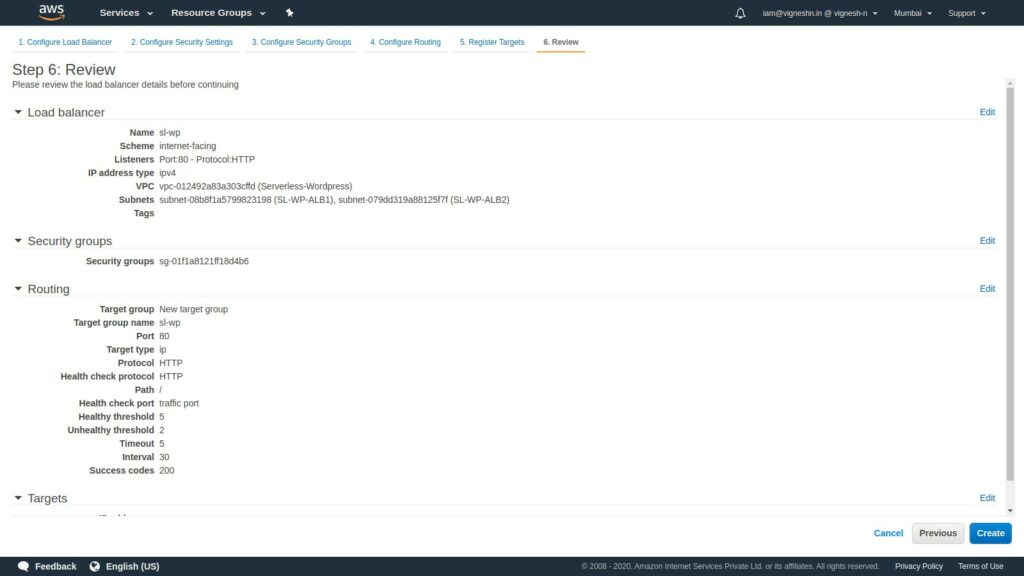
Click create and your ALB will start provisioning.
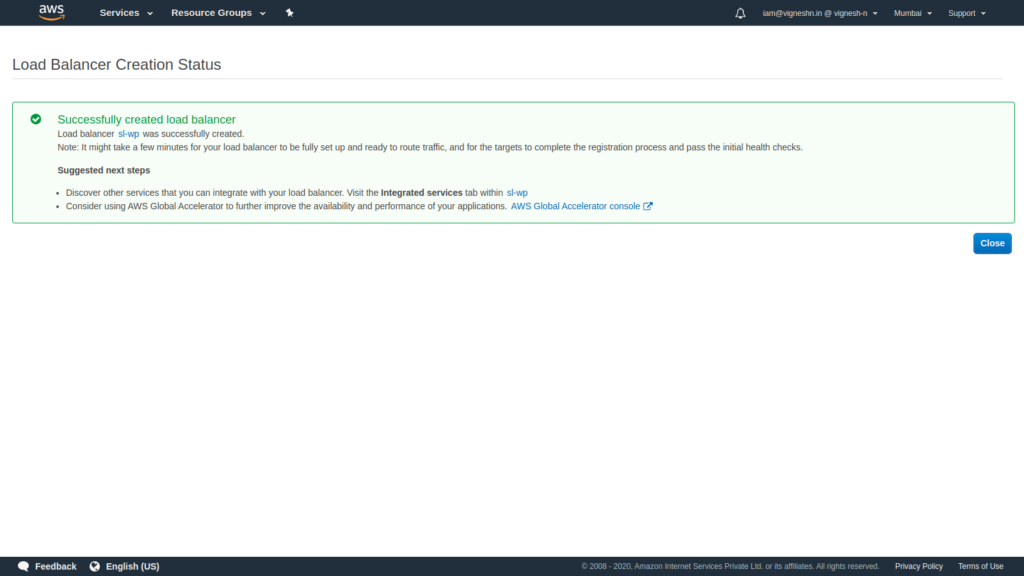
Now that the ALB is setup, we can move on to the Serverless WordPress part. The ECS setup.
First open up the ECS console
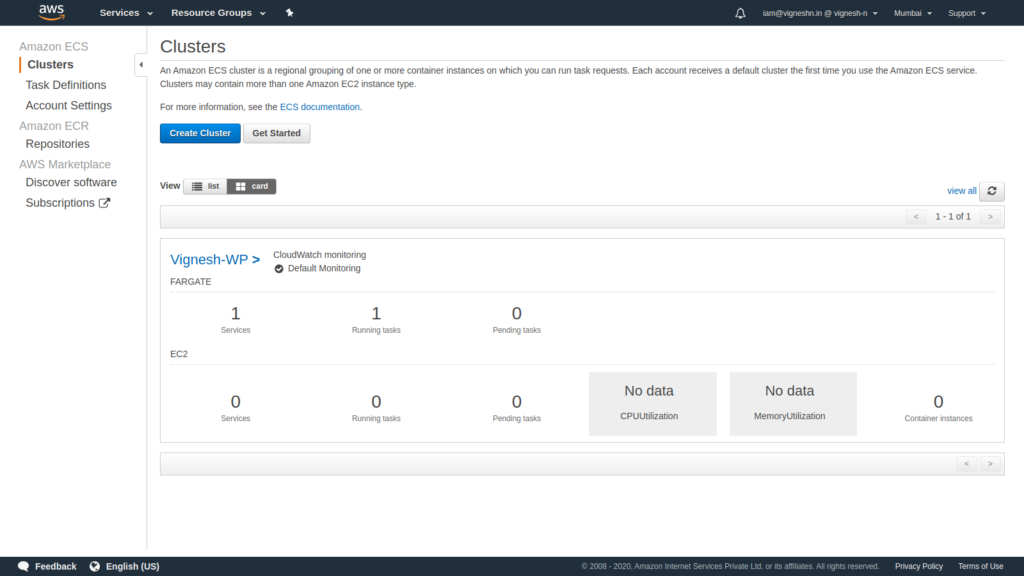
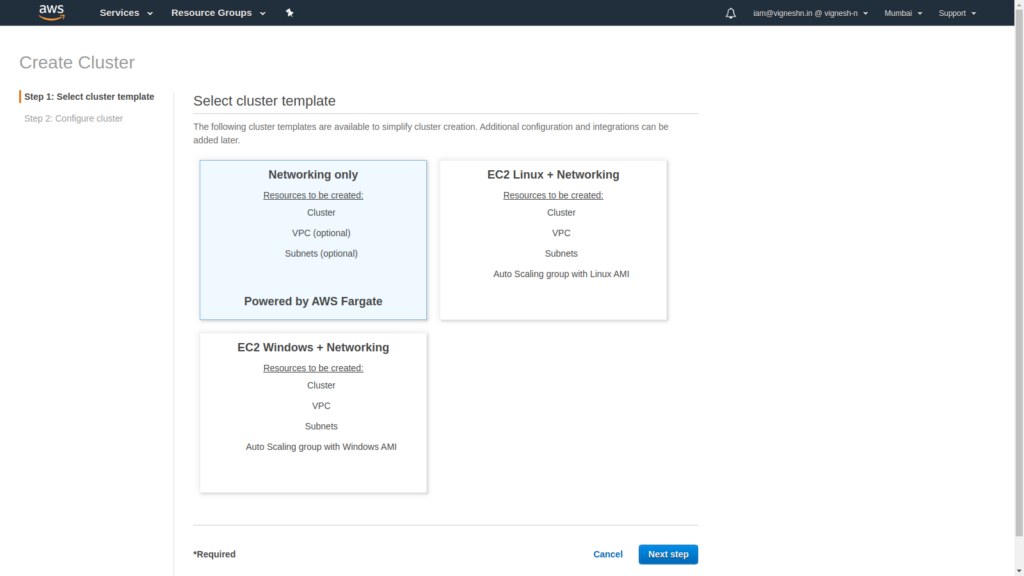
Create a new cluster with Networking only option.
Give a name for your cluster
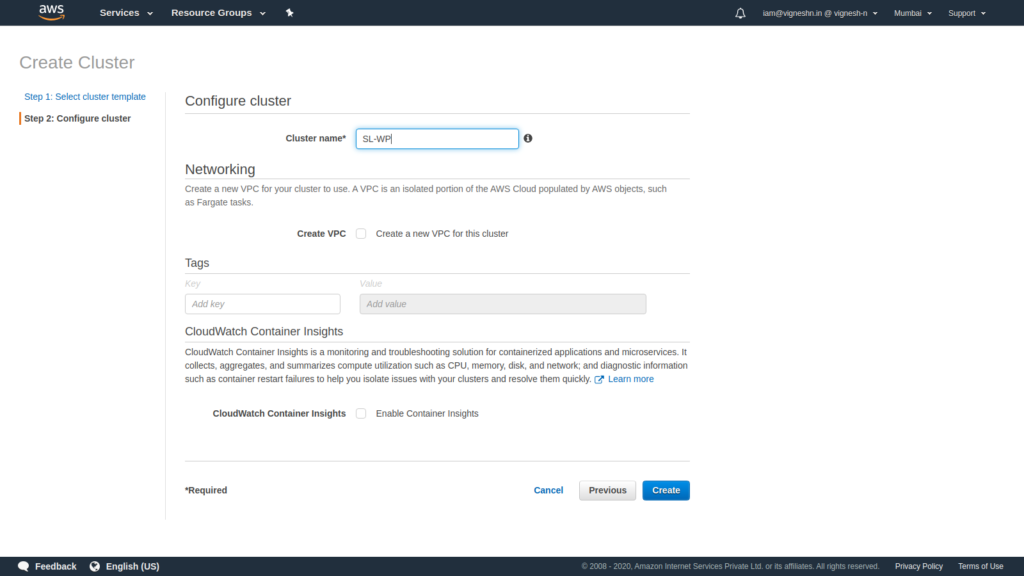
That’s it, a cluster is created.
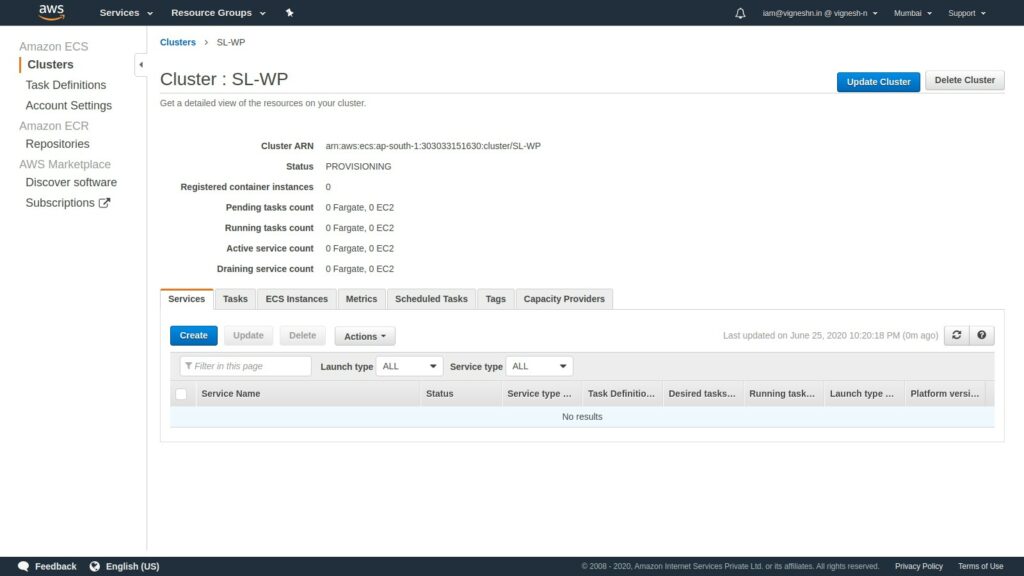
Now we have to create a task definition. Task definition is what specifies the container settings like image, volume, CPU, memory etc.
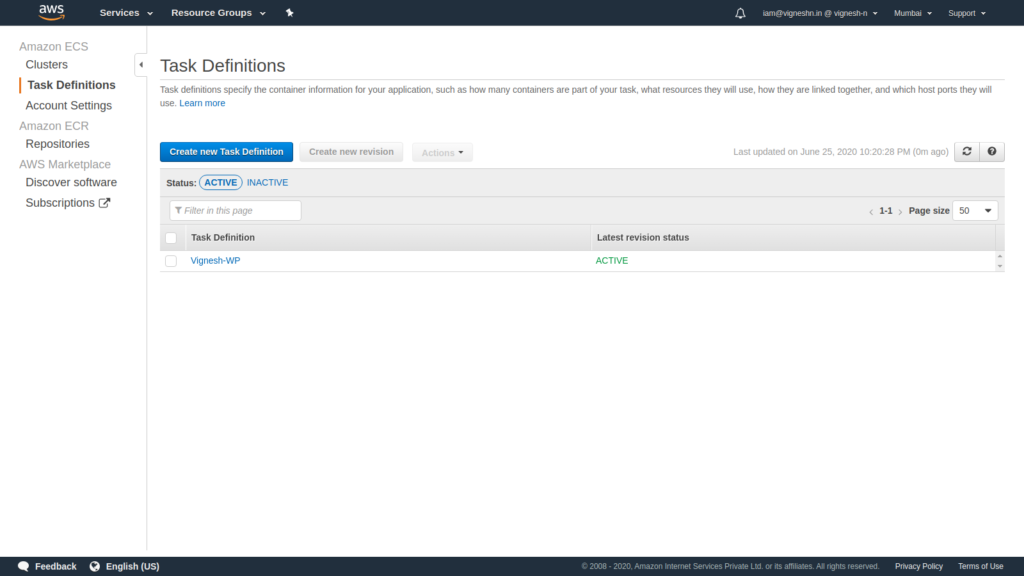
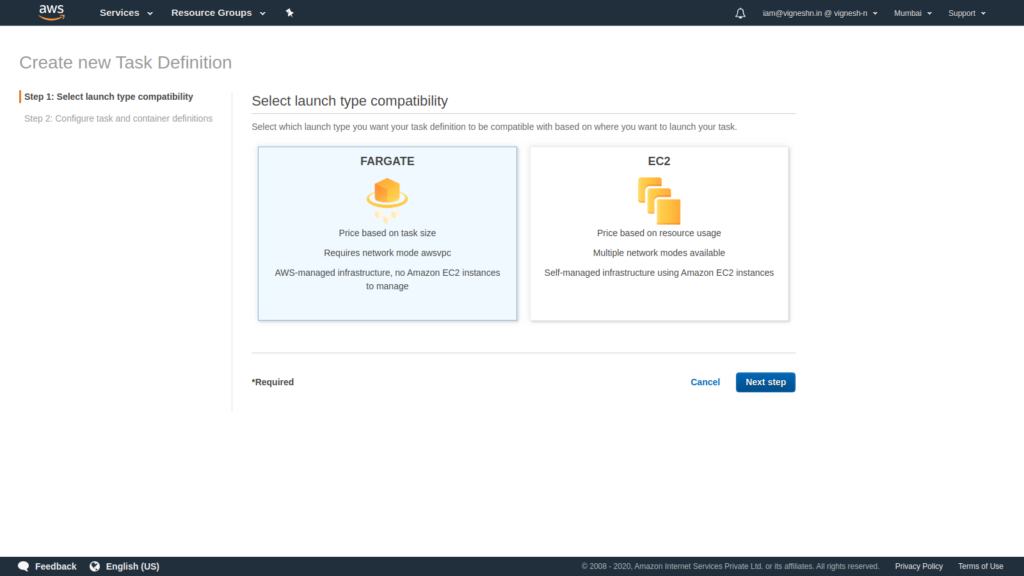
Create a task definition with FARGATE compatibilty.
Give a name for your task definition. You can also add a role if your container needs to access AWS services in the Task Role section.
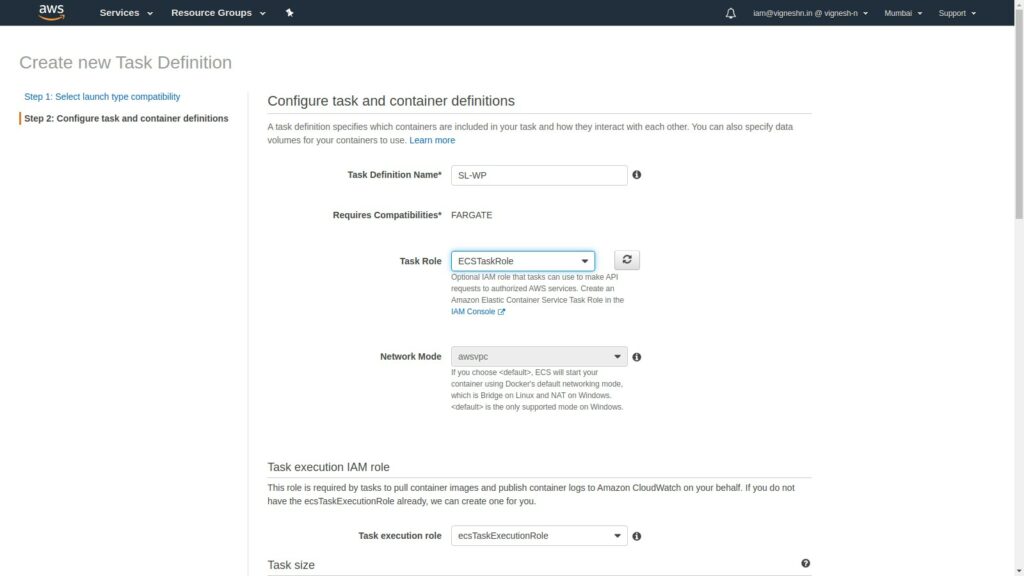
You’ll have to create a task execution rule and mention it.
Now set the required compute capacity for the container. Here the memory is set as .5 GB and there is a .25 vCPU. Do note the possible combination of CPU and Memory that is allowed.
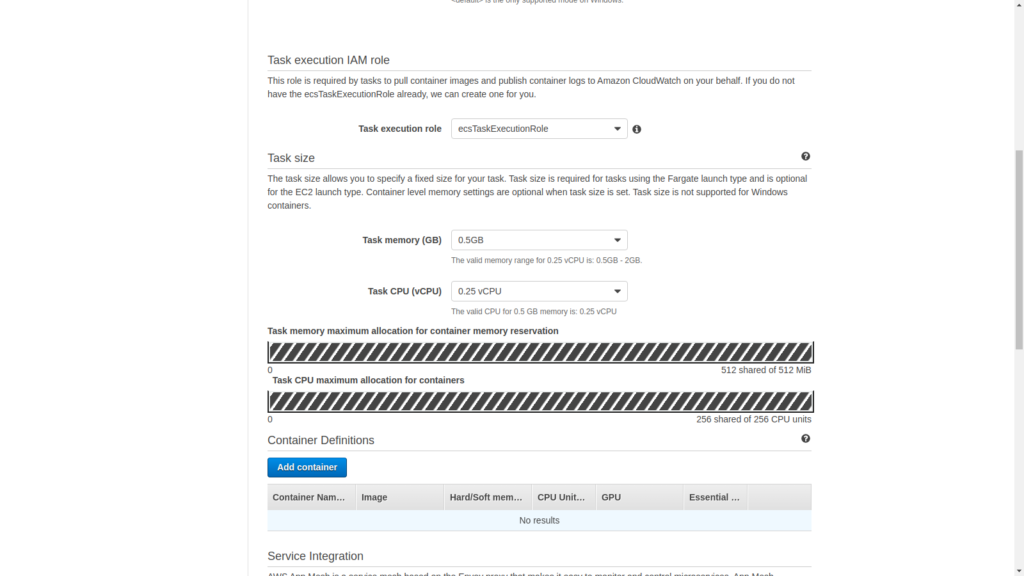
Now since we are going to add an EFS volume for persistant storage, scroll down and click on Add volume
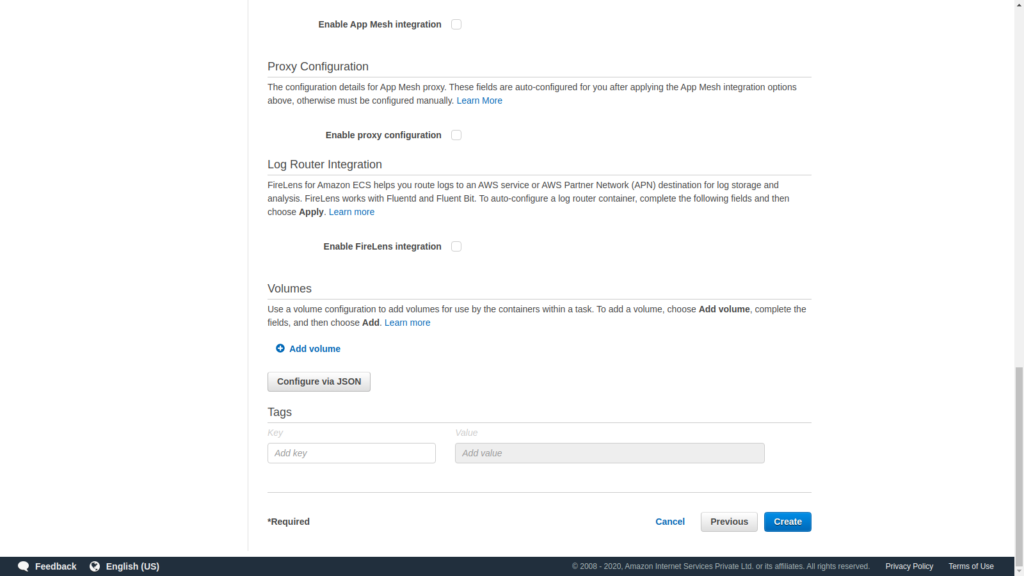
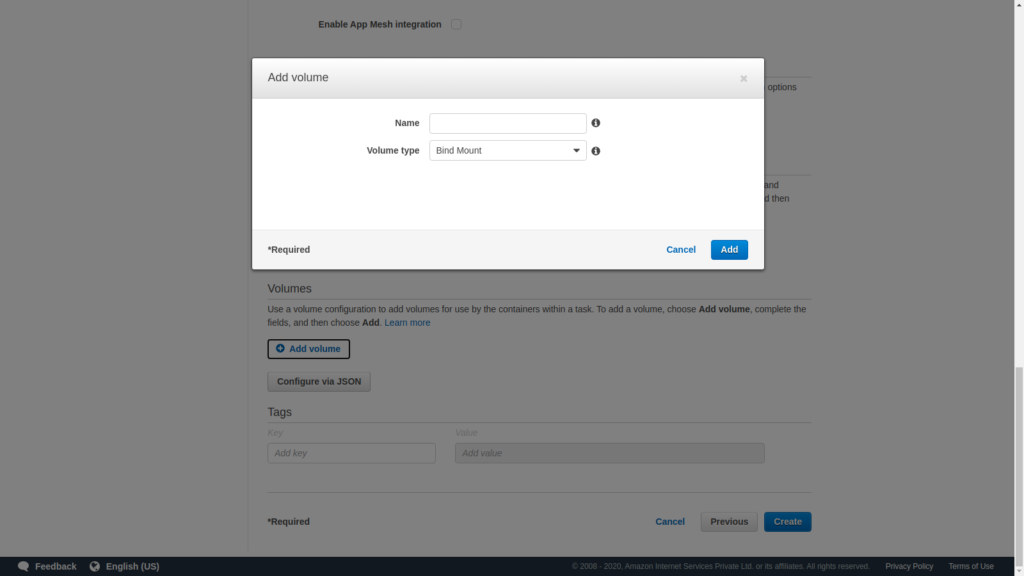
Give a name and choose EFS instead of Bind Mount. Bind Mount is for ECS EC2.
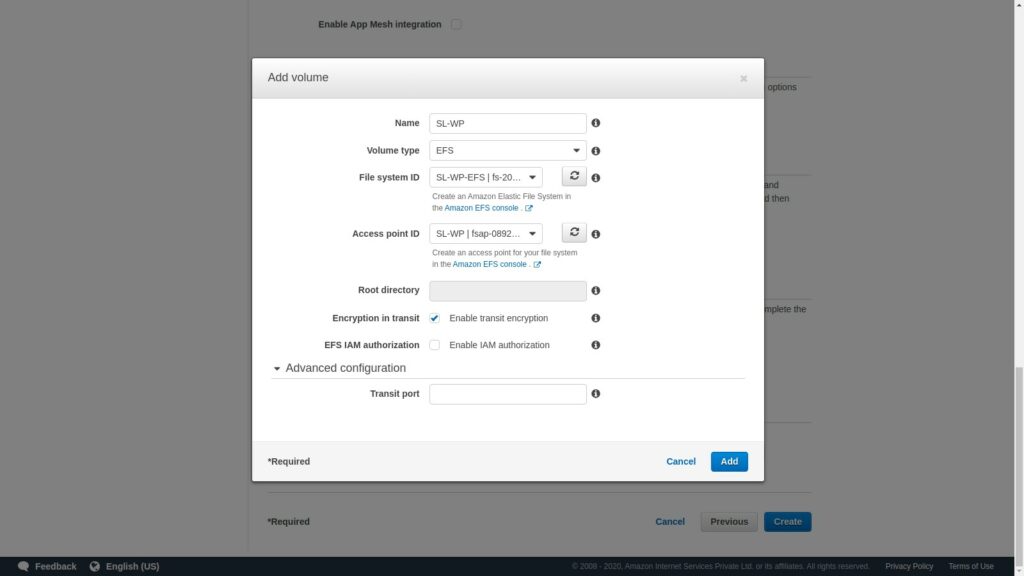
Select the file system and the access point ID, also enable the transit encryption and click on Add
Once that is over, scroll back and click the Add containers button. This is where we will configure the container settings.
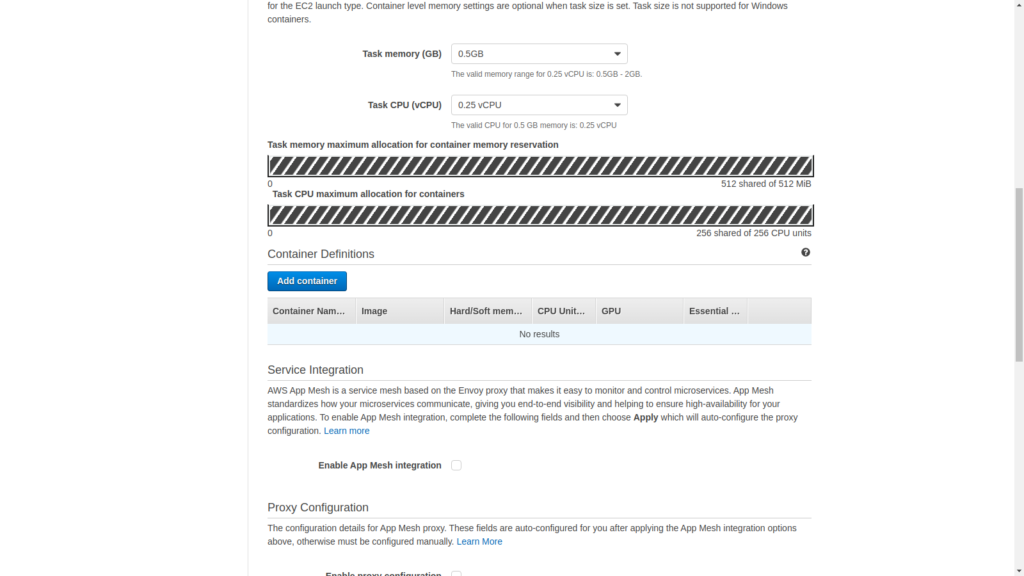
So, first start with a name for the container, then move on to the image URL. It can be ECR or Docker hub image.
You can set a soft memory limit if required and then in the port mapping section, enter the port 80 since this is HTTP.
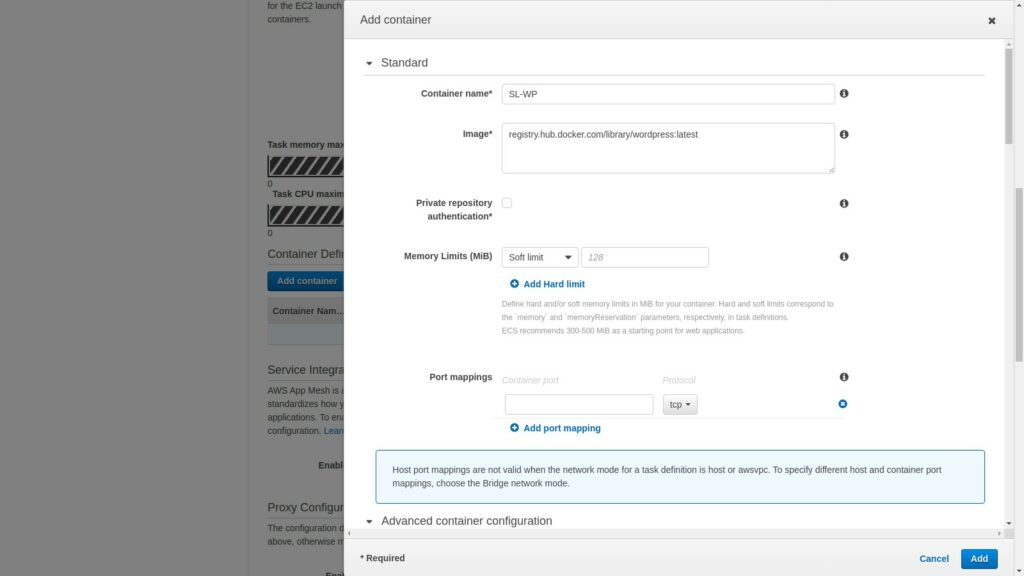
Since this is Fargate, you cannot set the host port. You can only expose the container port.
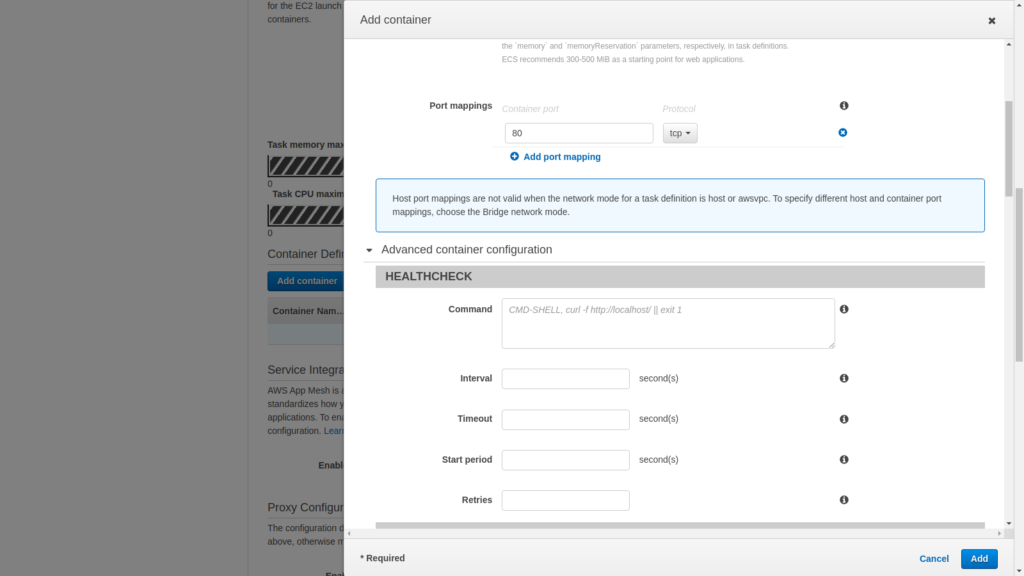
Once that is down scroll down and enter the following environment variables. This is from the WordPress docker image site.
WORDPRESS_DB_HOST: <rds endpoint>
WORDPRESS_DB_NAME: <name of the db created in RDS>
WORDPRESS_DB_PASSWORD: <strong password>
WORDPRESS_DB_USER: <mysql user for wordpress>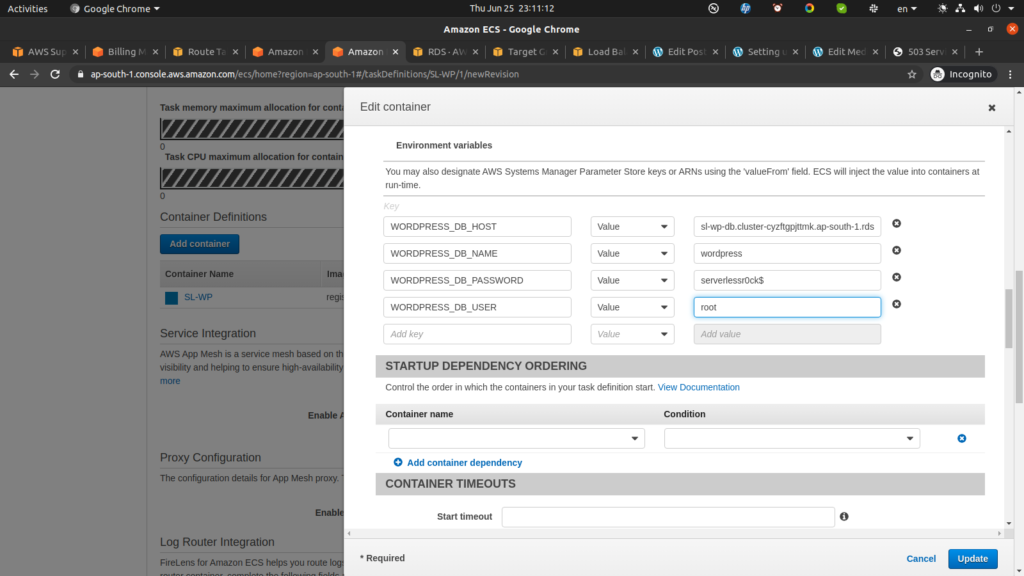
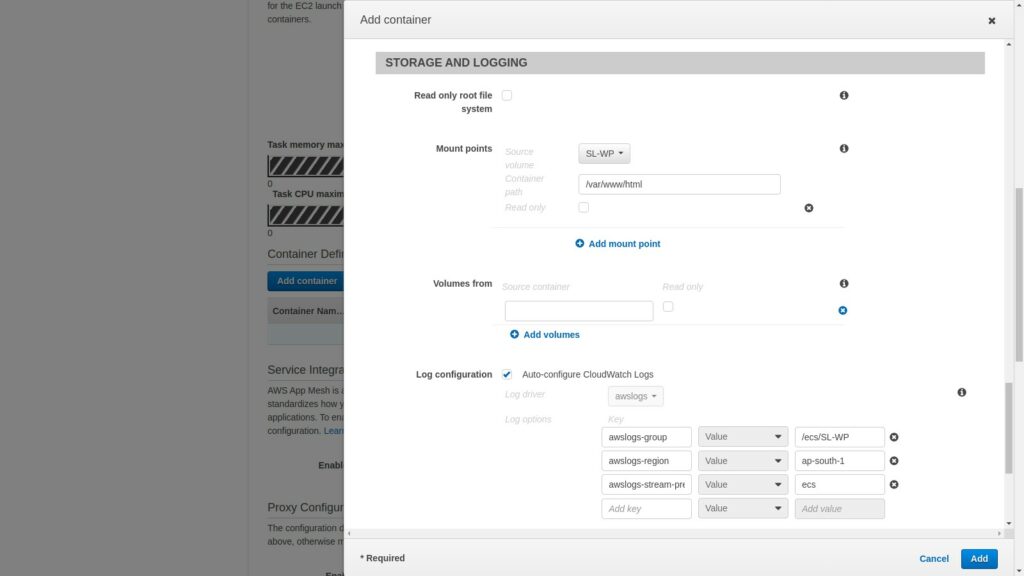
Next scroll down to the STORAGE AND LOGGING section and click the drop down next to mount points.
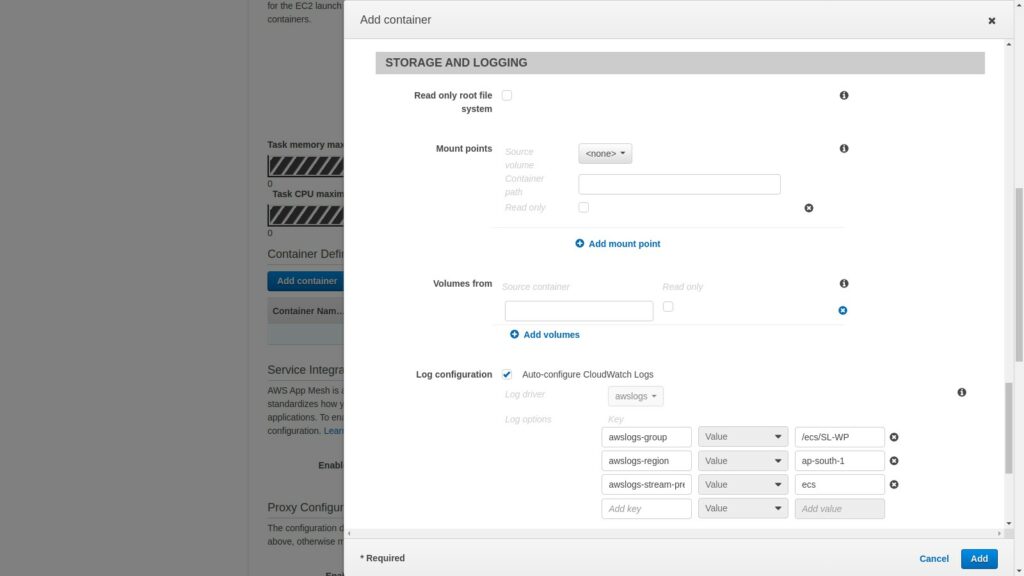
Select the volume that was previously created and enter the mount point as
/var/www/htmlSince this is where the wordpress contents will reside.
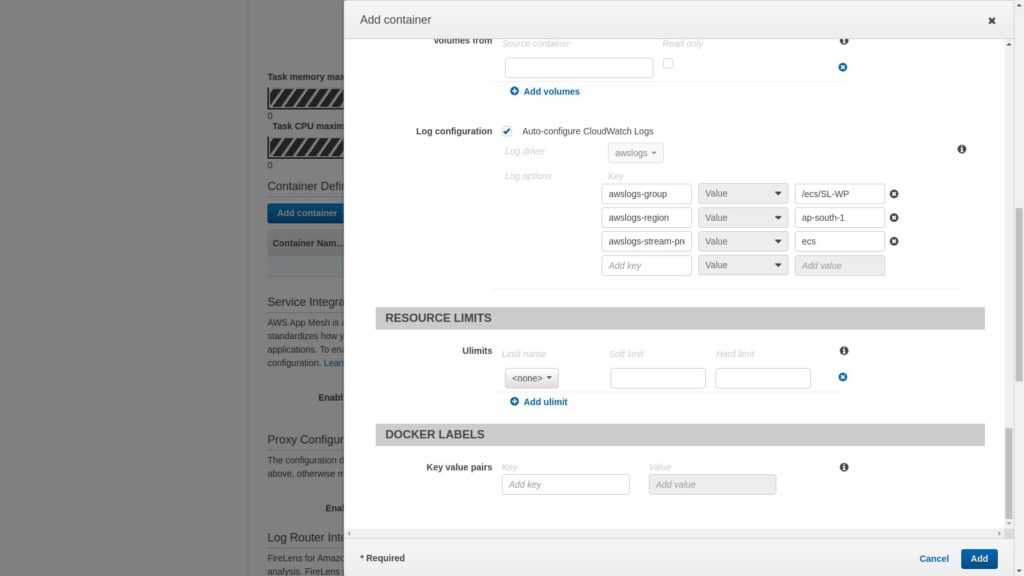
Now scroll down and click Add.
Now click on create to create the task definition.
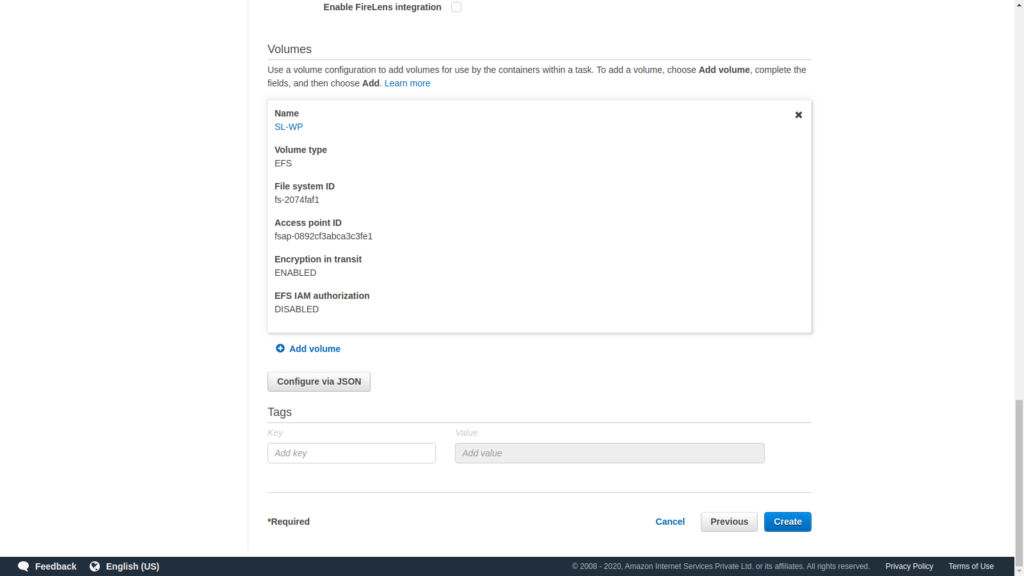
As you can see, the first revision of your task definition has been created.
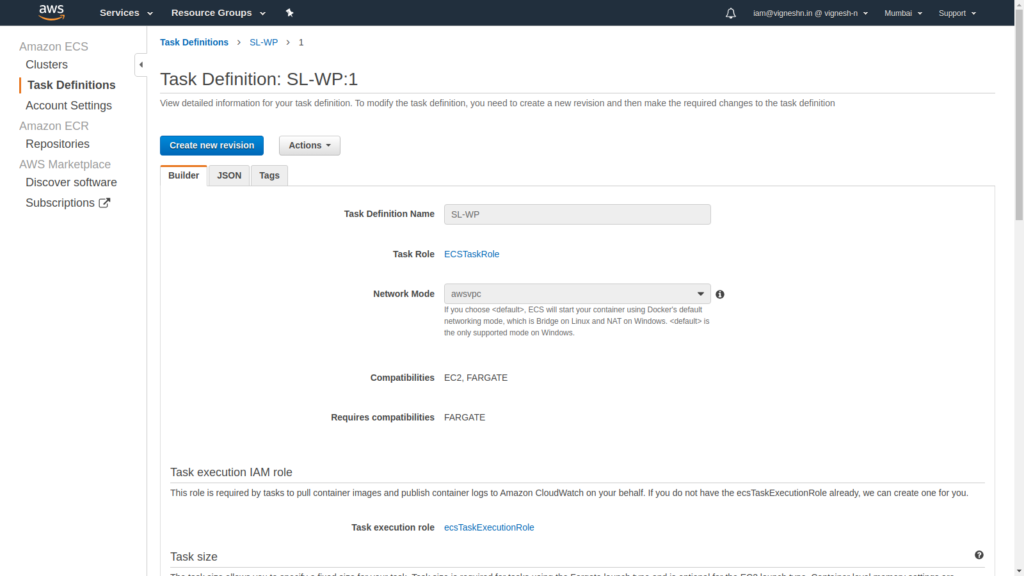
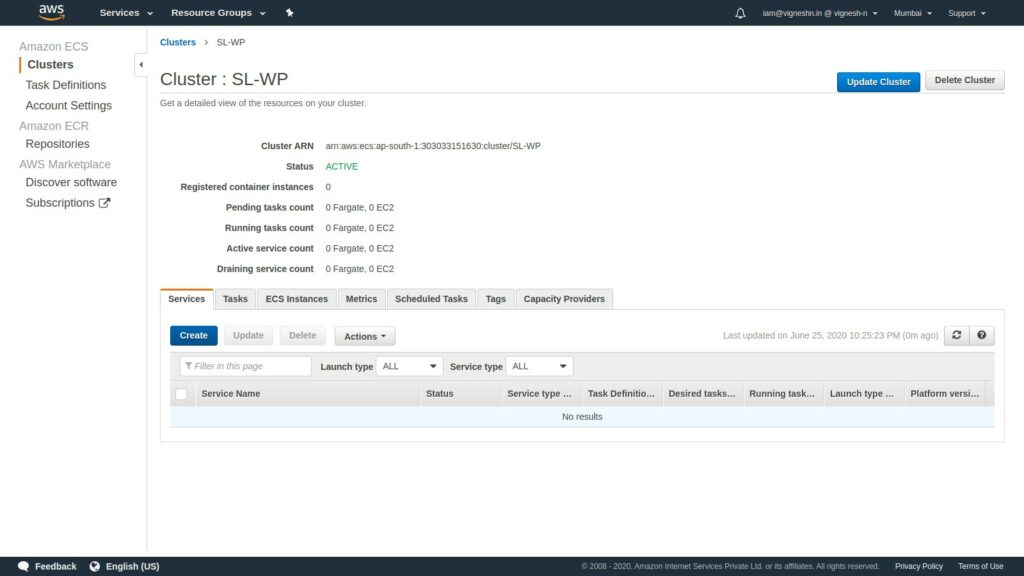
Now move back to the cluster, and create a new Service.
Specify it as being FARGATE and select the Task definition.
Next is the important part.
You have to select the platform version as 1.4.0. If you select LATEST, it is actually 1.3.0. I don’t know why it is setup like that but the EFS support was brought in 1.4.0 and hence if LATEST or 1.3.0 is selected you’ll get an error saying that some capability (they won’t say which) in the task definition is not compatible with the chosen platform version.
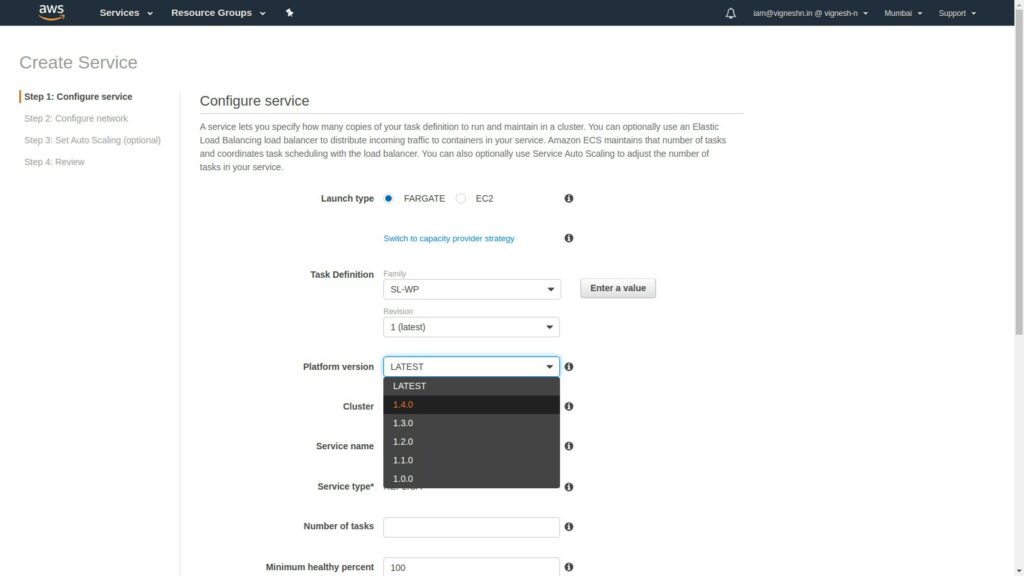
After giving the service name and the number of tasks (we can start with 1), we move on to the next section which is the network configuration.
Select the VPC and the subnets.
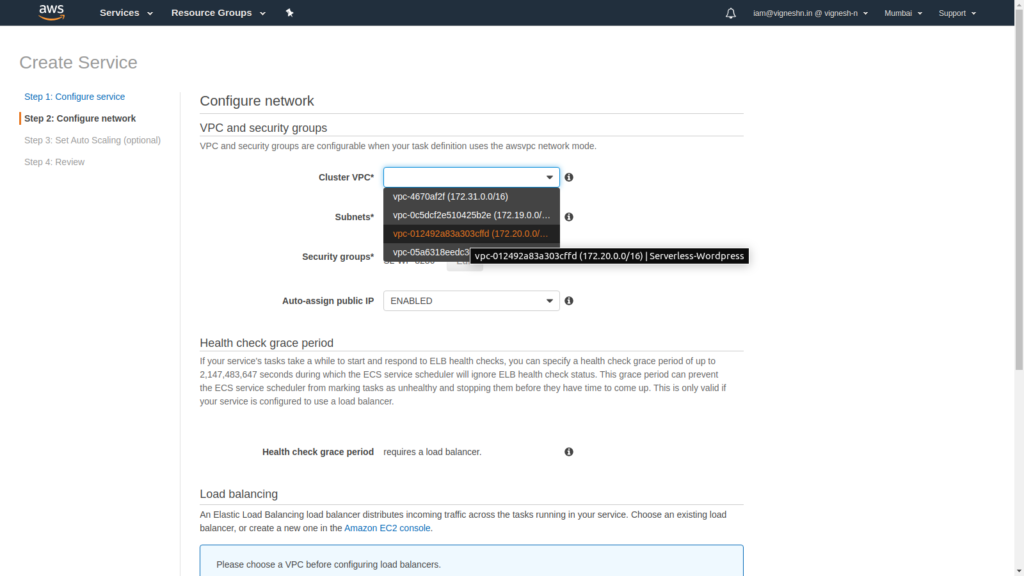
Next select the security group we created for ECS.
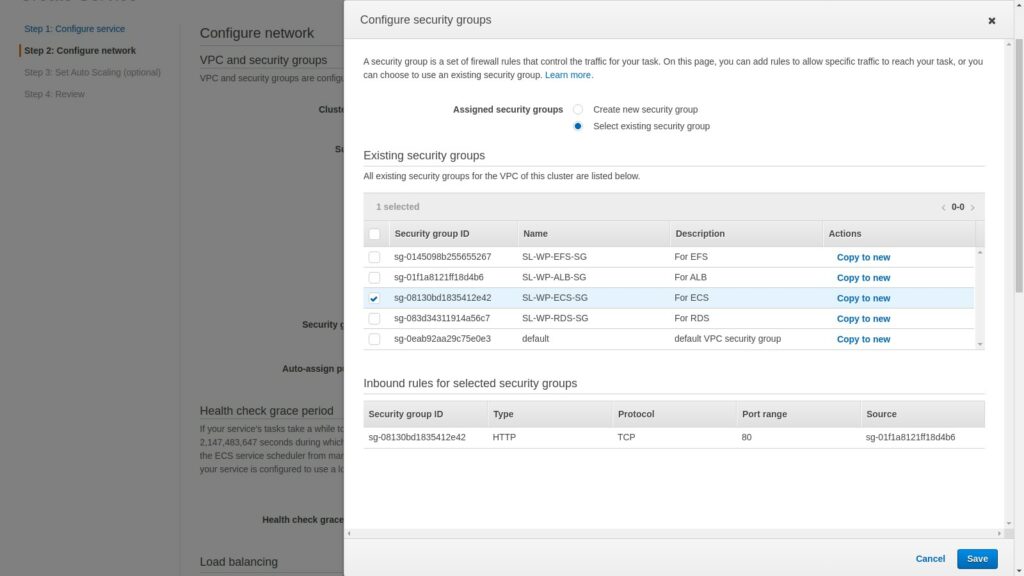
Now click on Application Load balancer and set the health check grace period as 60 seconds.
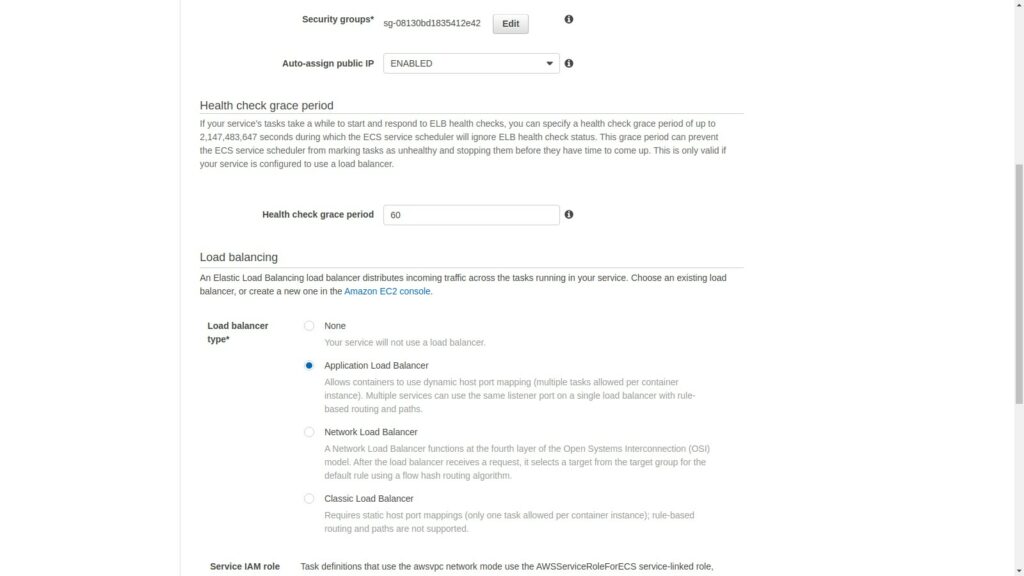
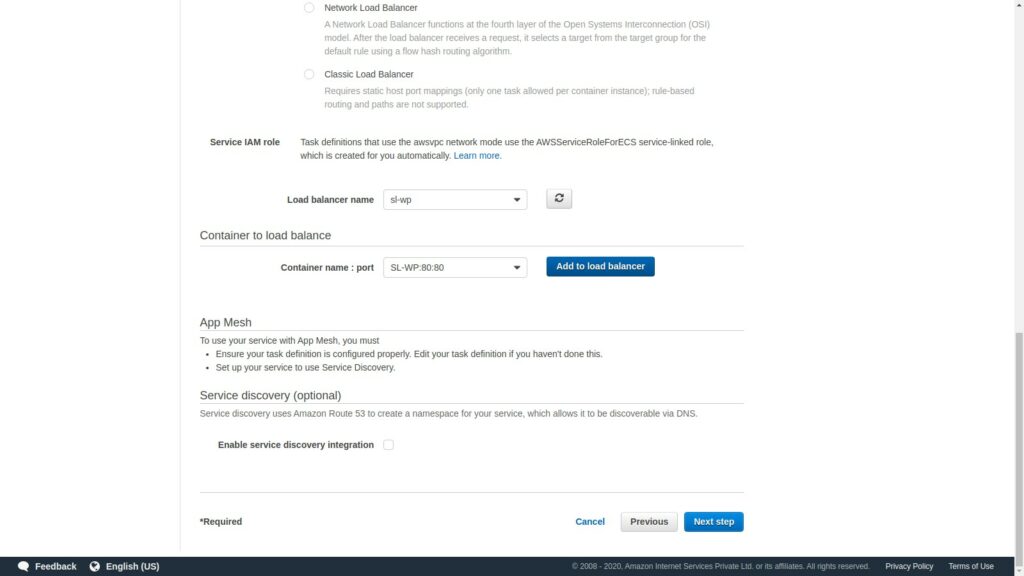
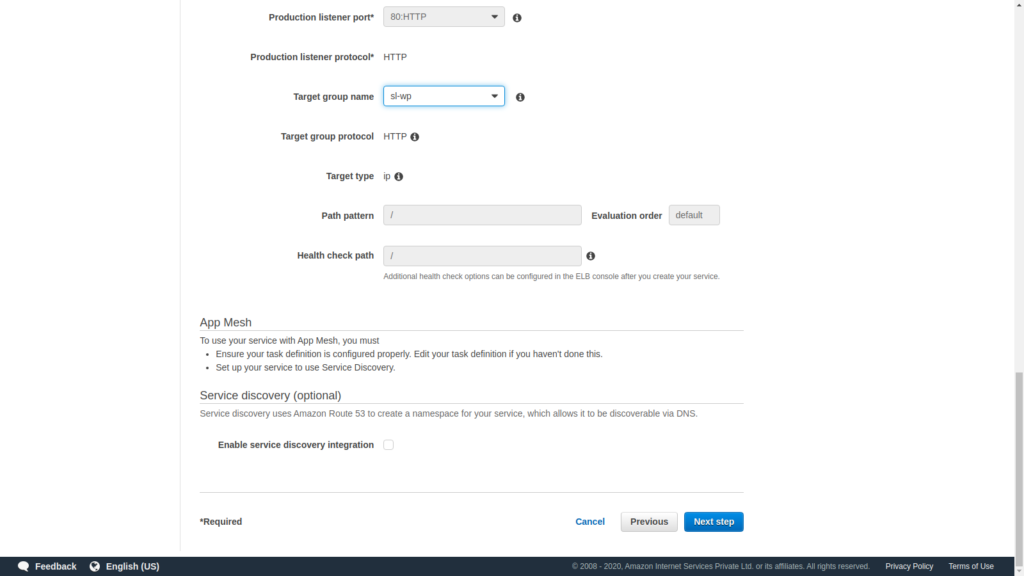
Select the load balancer that was previously created anc select the container name:port and click on Add to load balancer.
Next select the target group that we had previously created.
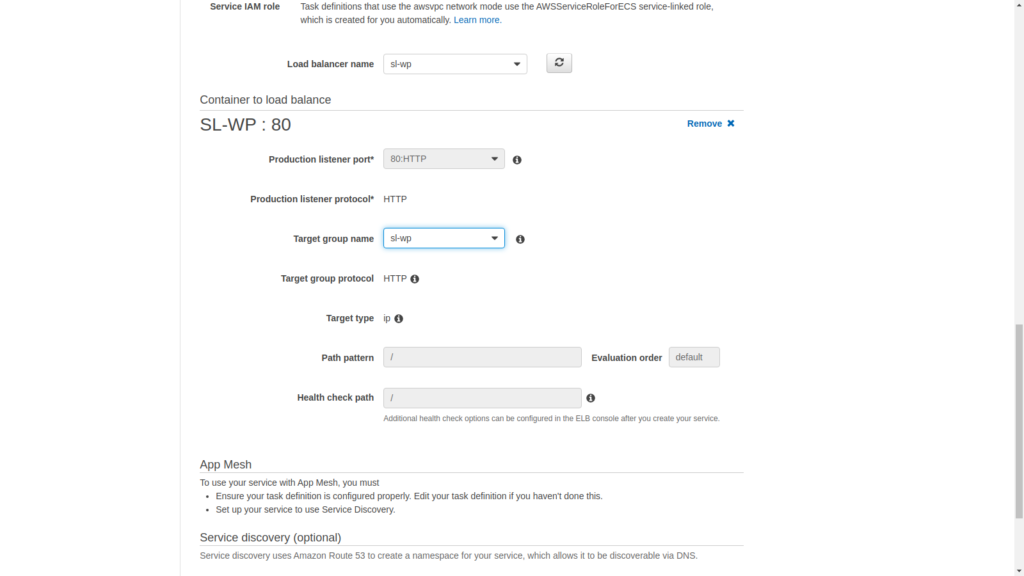
That will fill up the rest of the fields and we can move on.
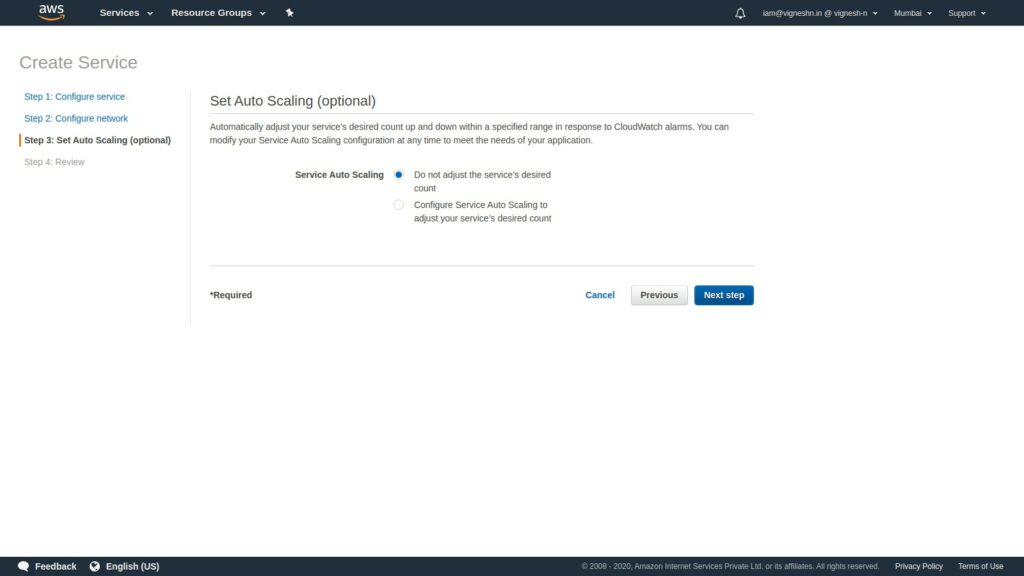
Now we can set up the autoscaling. In this setup I am not setting an auto-scaling but it is as simple as giving the maximum minimum and the desired number of cluster nodes.
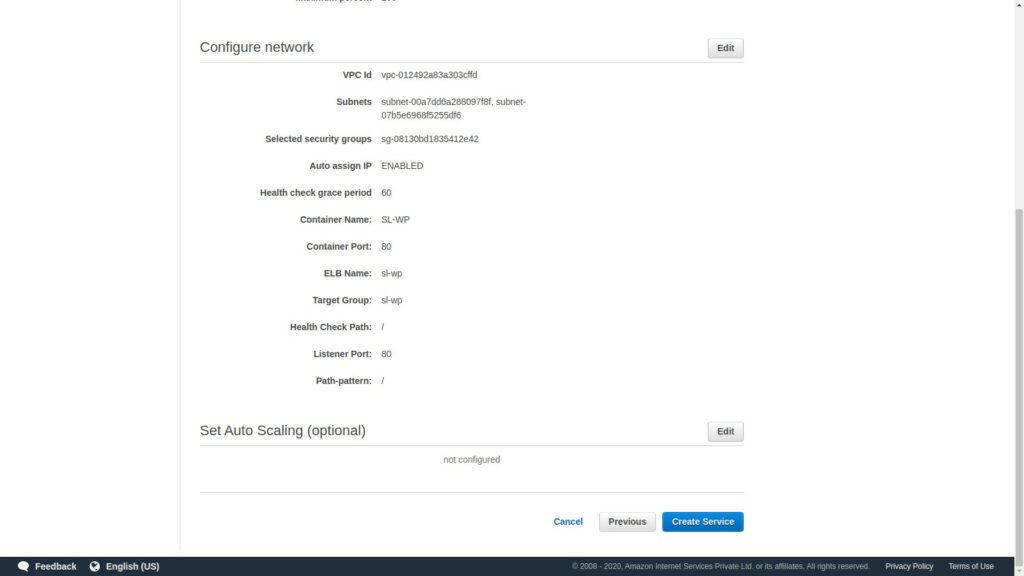
Now review your configuration and once you are satisfied, you can click Create Service.
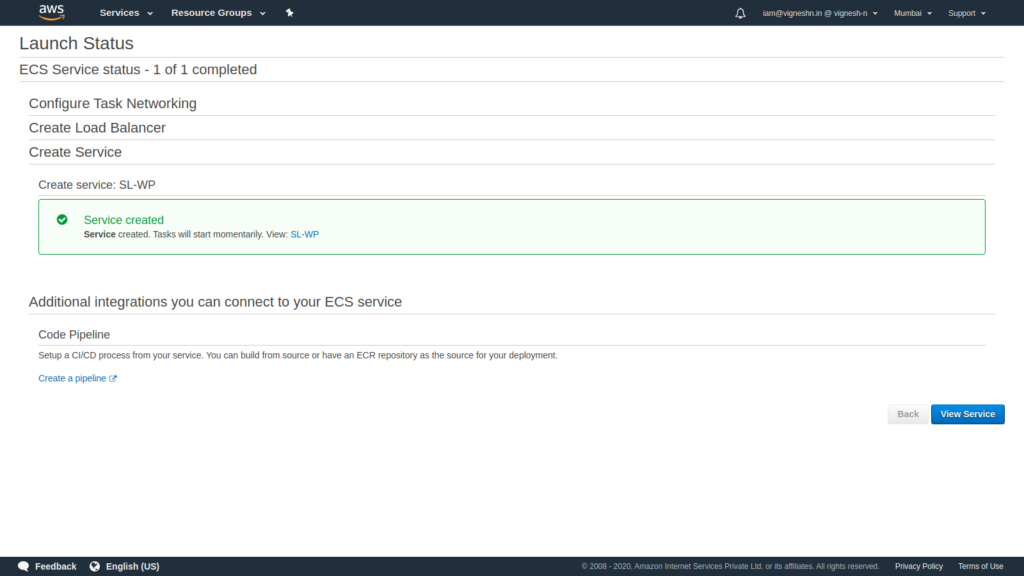
Now the service is created, wait for the containers to spin up.
Once the container is running, copy the DNS name of the ALB and paste it in your web browser and hit enter.
That’s is you have completed the Infra side setup for wordpress.
Now it’s time to complete the WordPress setup
Select the language.
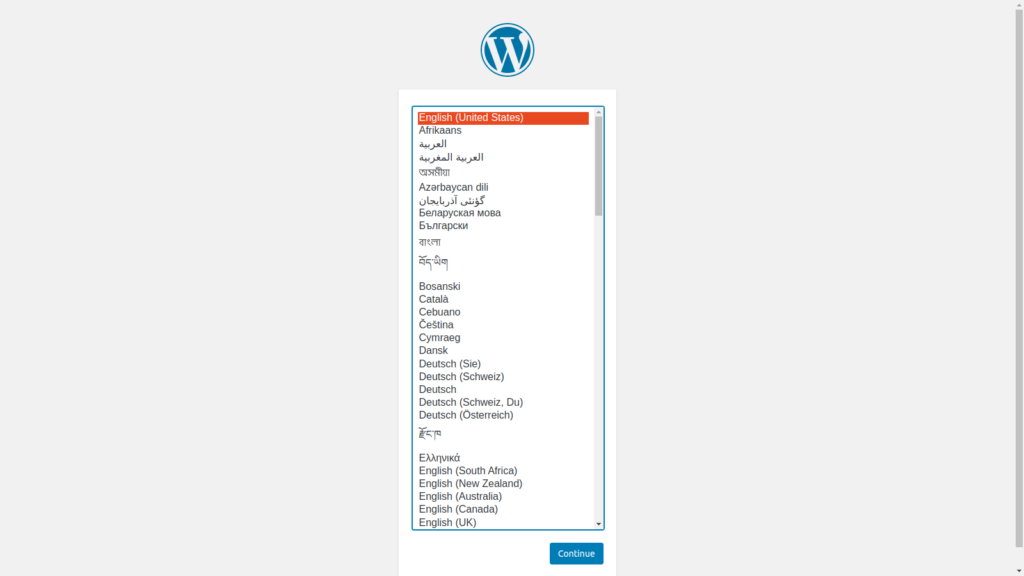
Since we had already given the DB details as environment variable, it was not asked during the setup.
Now enter the Site title, admin username, password and the email.
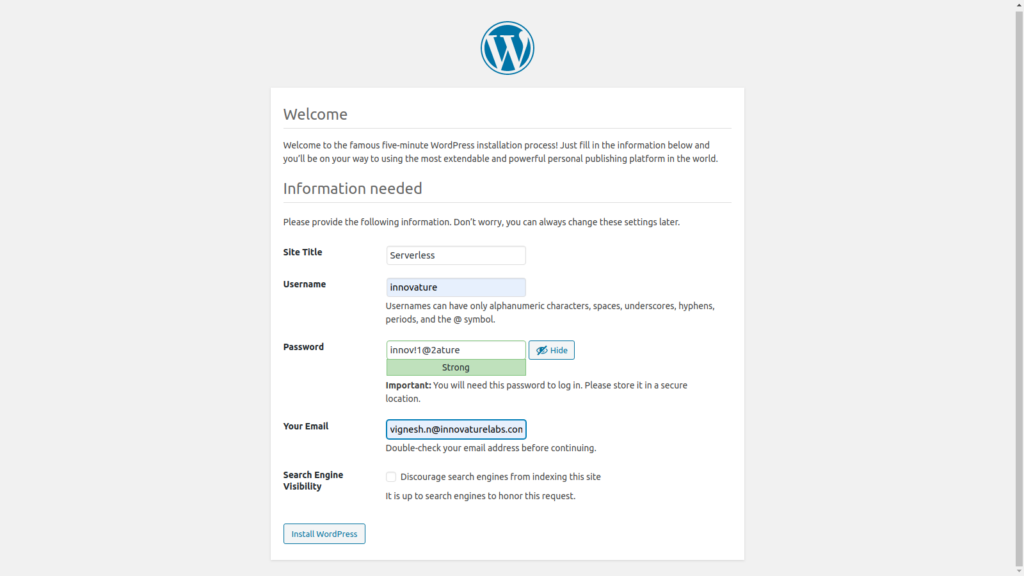
That’s it, WordPress installation is now complete.
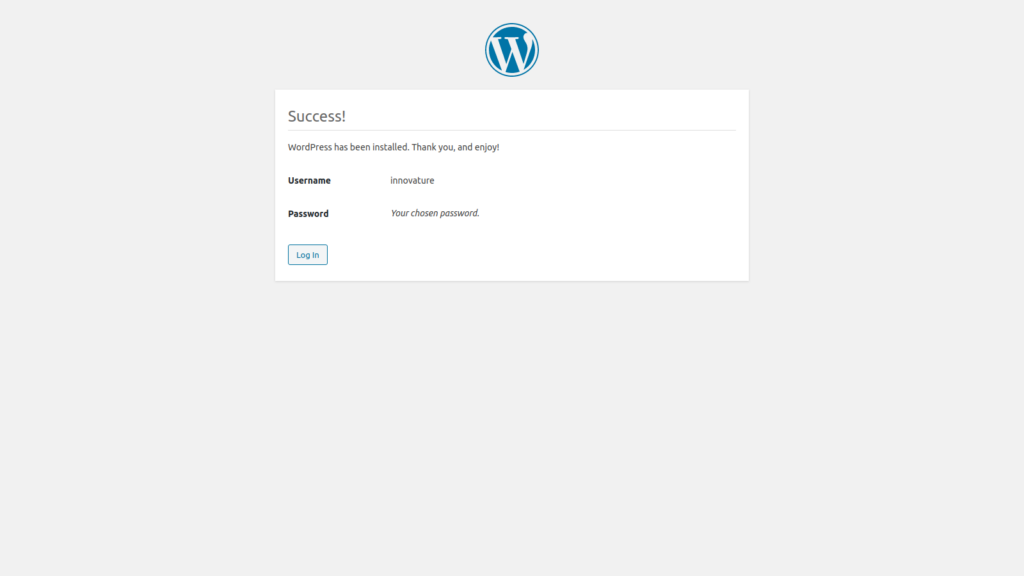
Login to view your dashboard.
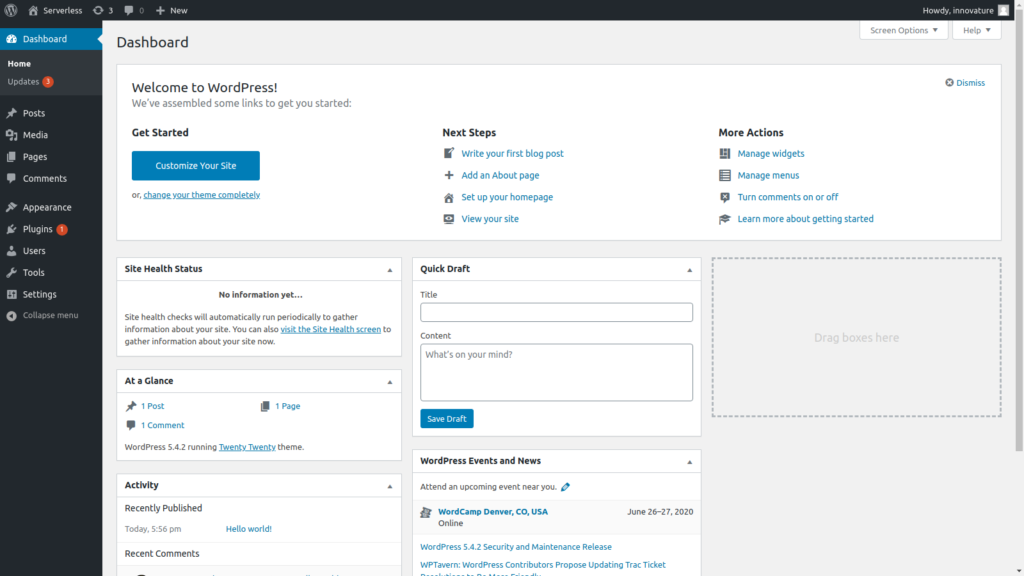
You can see the URL of the ALB here.
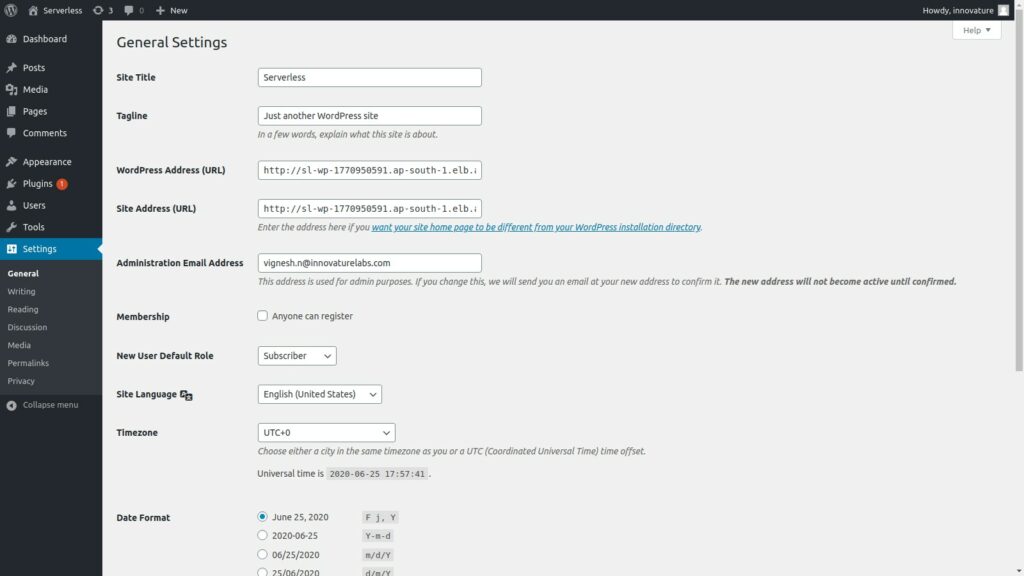
And this is the home page.
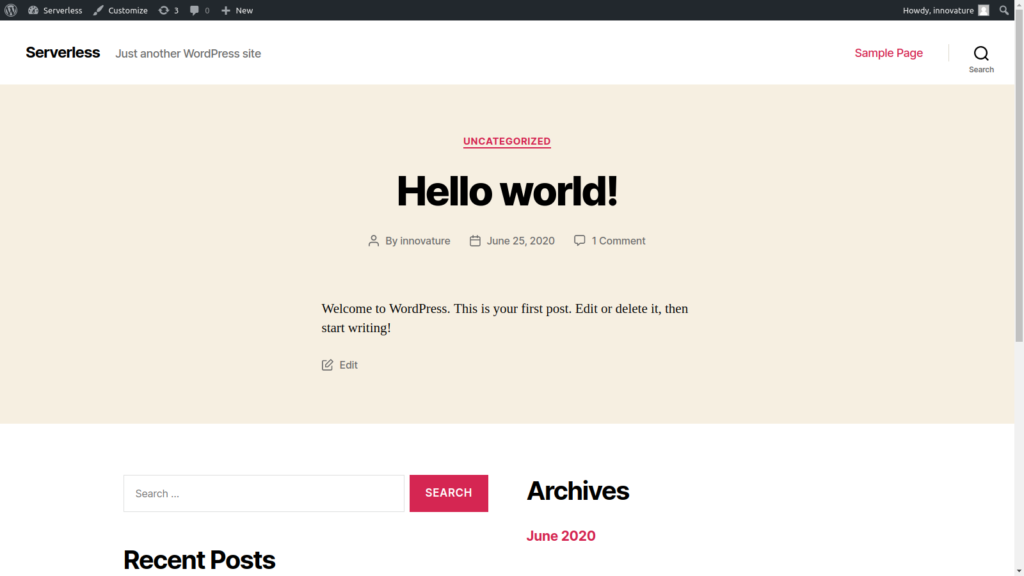
And that’s it, you have setup a serverless wordpress in AWS.
If you have more requirements than this, you can contact me or MeviTech (my company) and drop a message and we will contact you.


